|
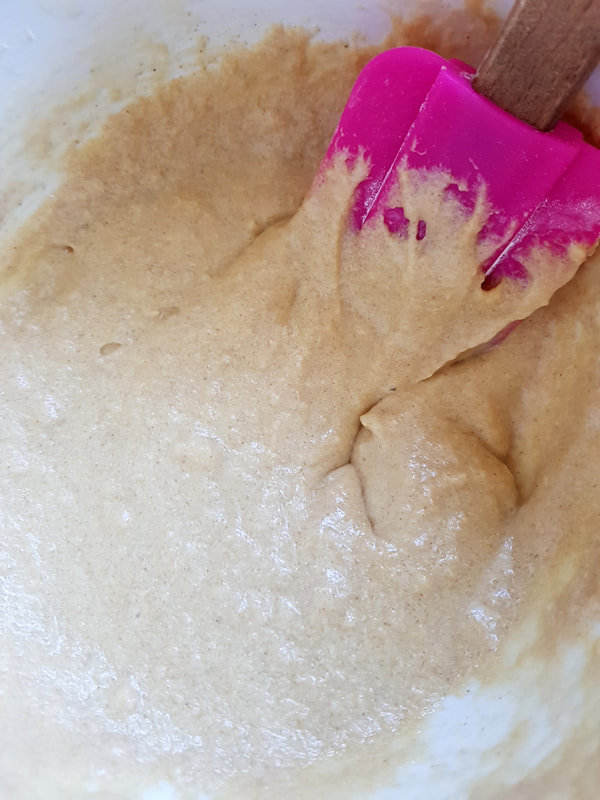
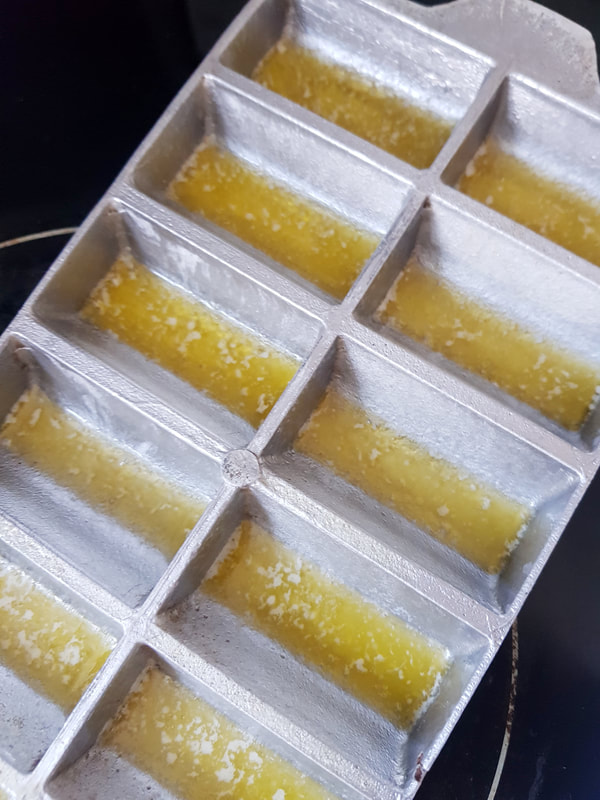
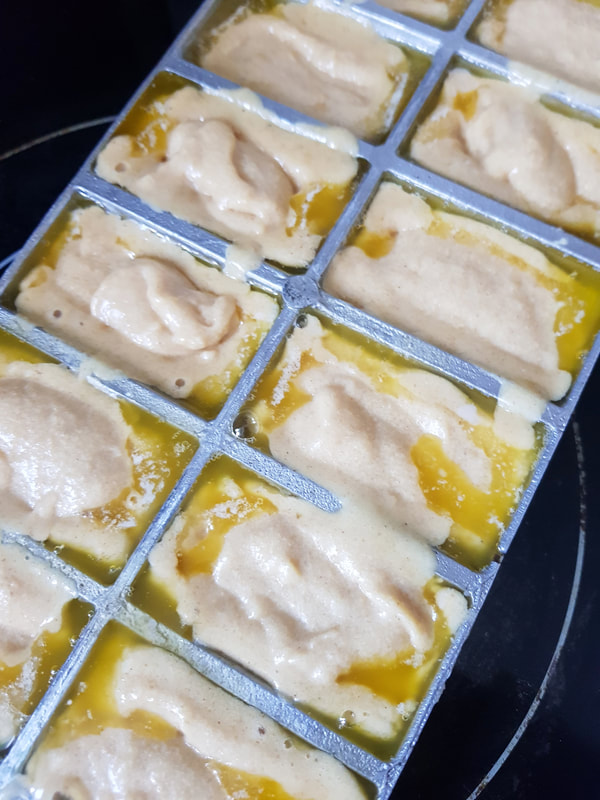
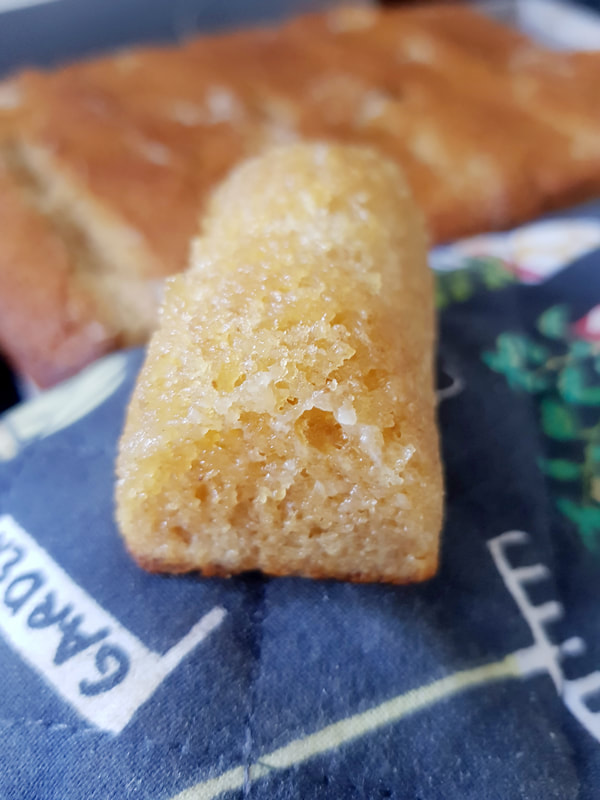
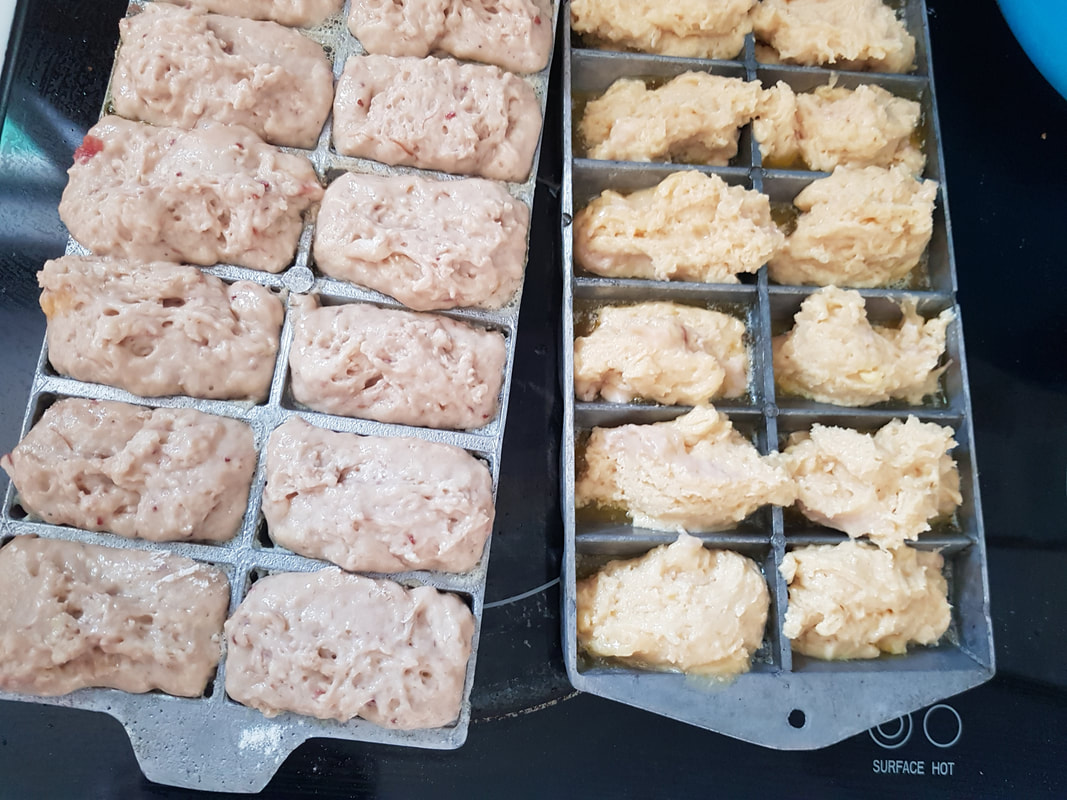
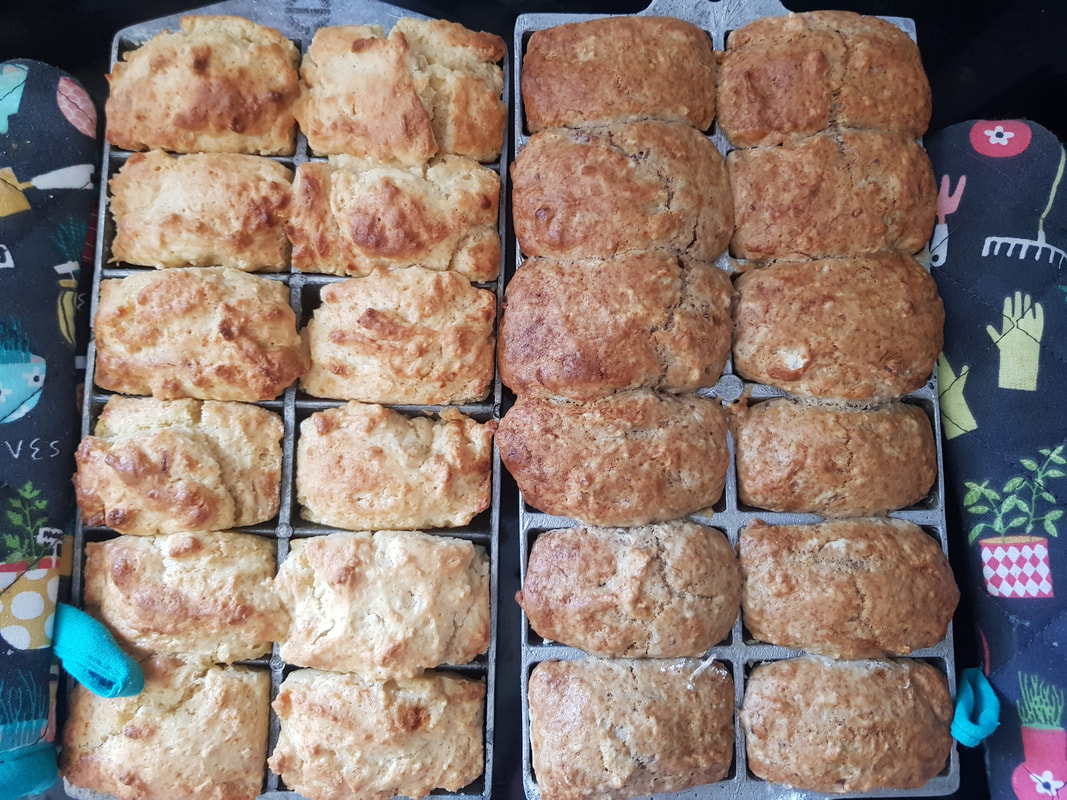
Baking my way through the Edmonds Classics Cookery Book. The next is 3 recipes called Gems. For them you need a gem iron. I had to google what they were and found they are an almost vintage cooking tray that initially is made of cast iron, but later versions were aluminium. I couldn't buy them new, so I bought some off Trade Me. I was really surprised how small they were. I had envisioned a muffin size tray, but a Gem Iron is half that size, producing little cakes about the size of a Tasti Snak Log.  There are 3 gem recipes and 6 cute memory stories. It definitely seems an older recipe used in the past and replaced more by muffins. You preheat the Gem irons in the oven, make the batter, then sizzle a half teaspoon of butter in each section of the gem iron before putting in the batter and finishing in the oven. GINGER GEMS The Edmonds recipe for this is here: EDMONDS GINGER GEMS

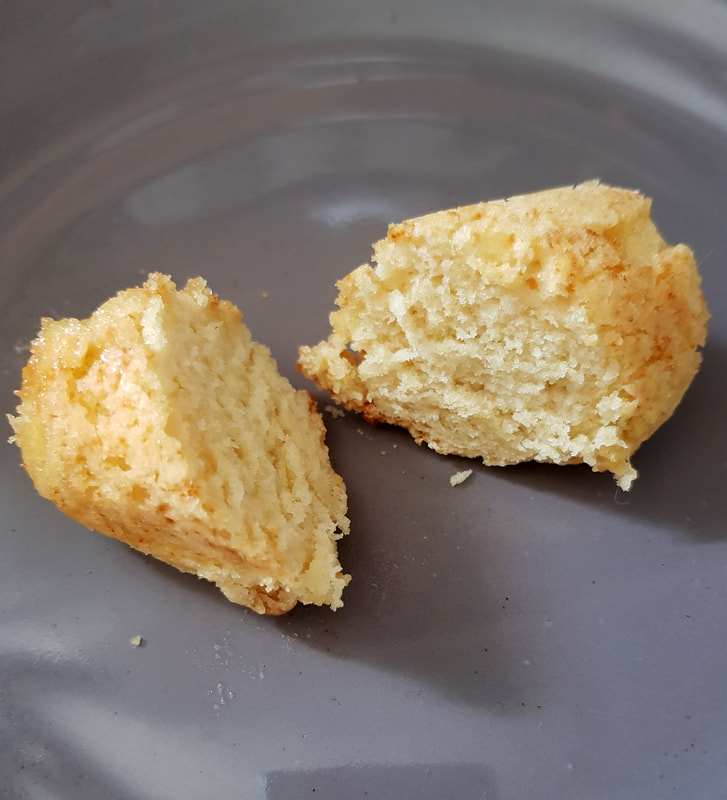
I think I should have baked them a little longer to have more of a crusty bottom, but these are really light and nice. Bruce said they reminded him of steamy puds, and I can imagine them being really yummy with dates. HONEY GEMS I couldn't find an online Edmonds recipe for these. They were our least favourite. These were more dense, more like a dense muffin than the cake texture of the other two. I made these along with the Raspberry Gems.
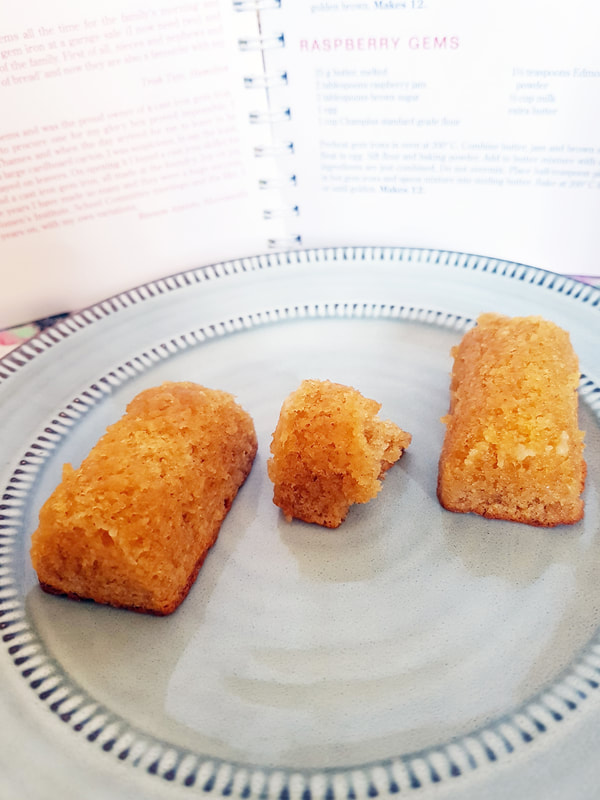
RASPBERRY GEMS No online Edmonds recipe for this one too. The book uses raspberry jam, but when I went to buy some, Pak n Save had sold out. So I used Barkers Rhubarb, Strawberry and Raspberry fruit compote.  These were light and fluffy and were really yummy with the fruit compote and yoghurt. These were our favourite.
Gems are really quick to make. They are not as sweet as cakes or muffins. We liked them and I will make them again.
0 Comments
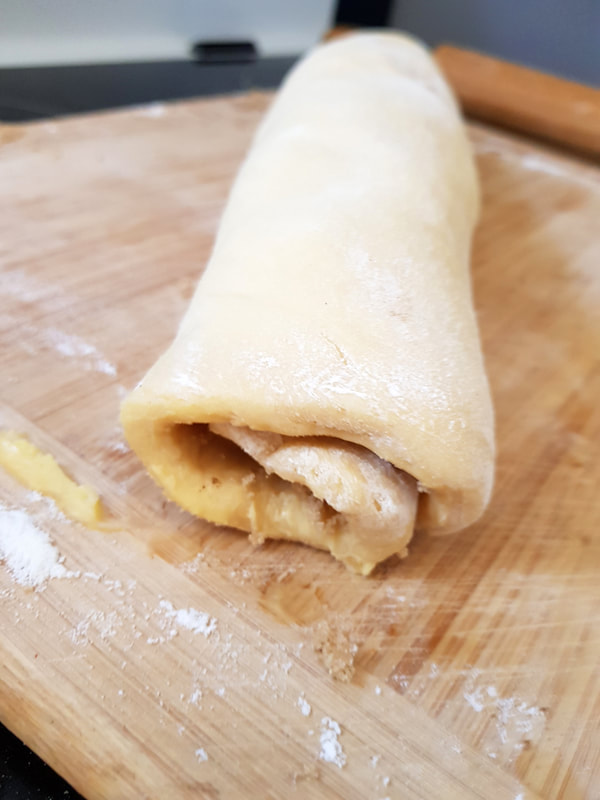
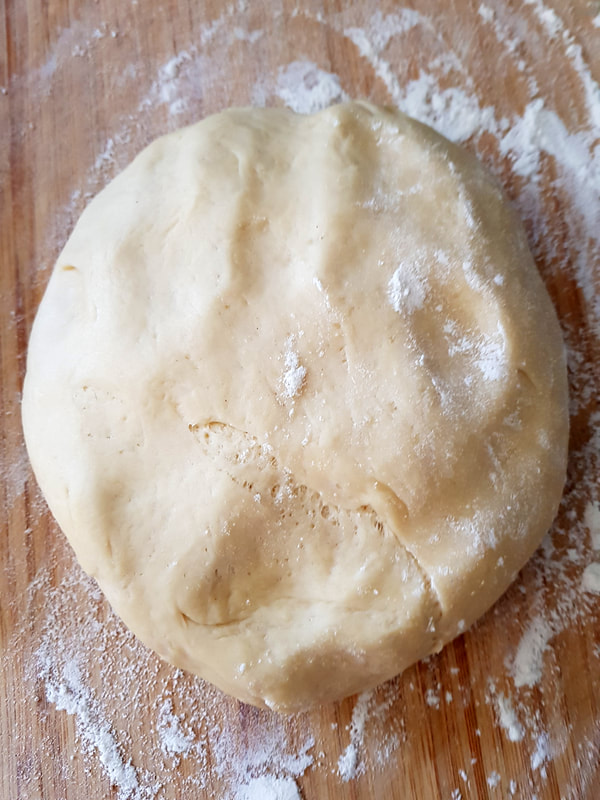
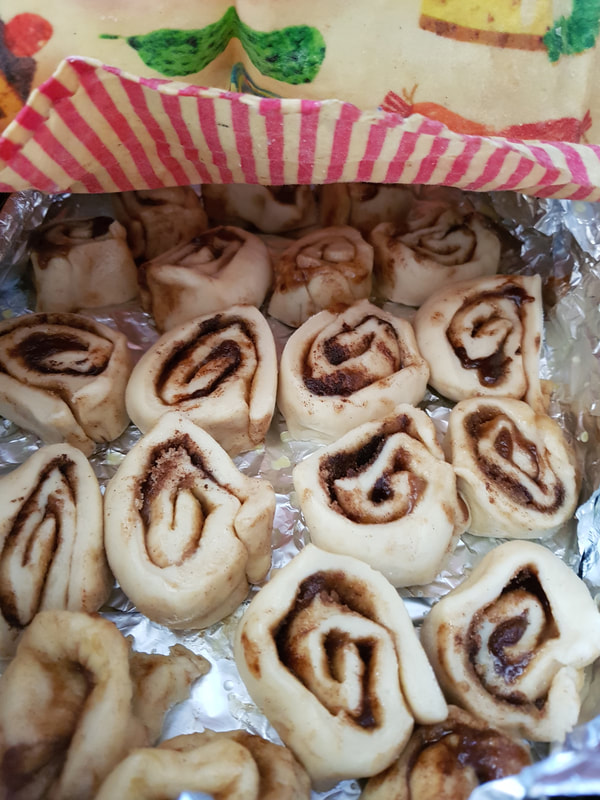
The next recipe in my 'Baking my way through Edmonds Classics Cookery Book' is Chelsea Buns. Again in my other Edmonds later edition cookery book, there is a chelsea bun recipe that is a bit different. My Classics recipe includes 2 eggs, baked on a tray, and has icing on top. The 2008 edition has no eggs, baked in a round tin and the chelsea buns are glazed. I curious about both, so I made both. CLASSICS VERSION
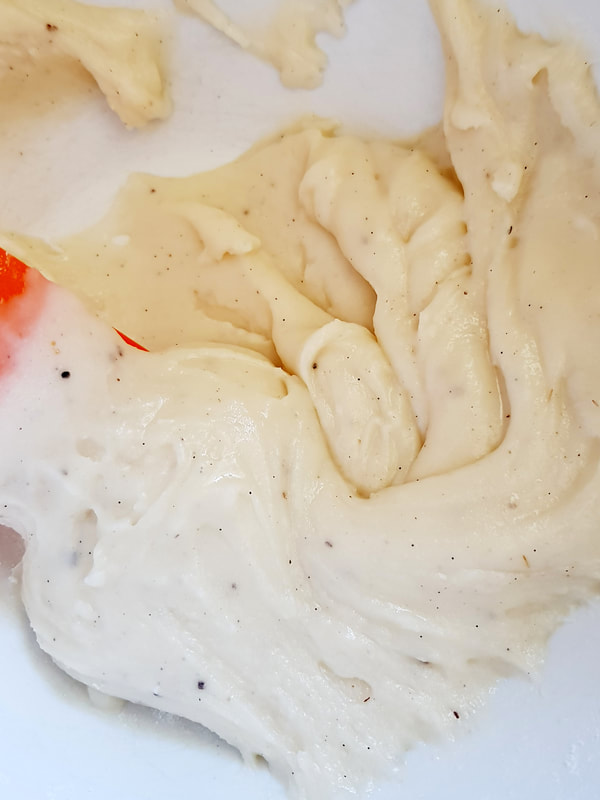
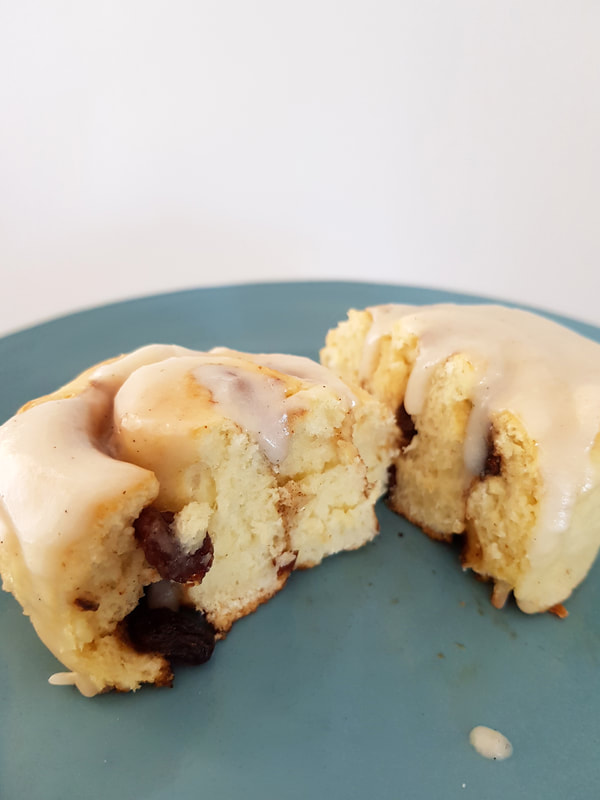
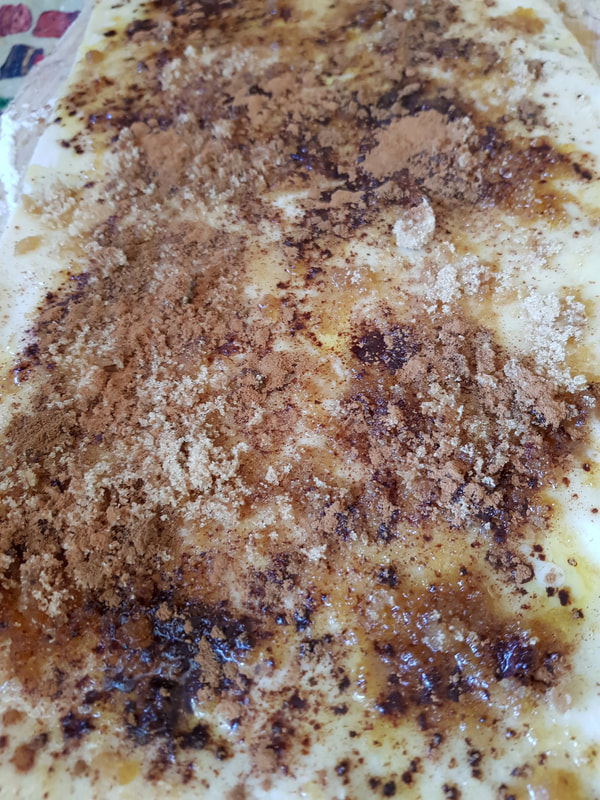
The bread dough wasn't as light and fluffy as I was expecting. I felt it needed a pinch of salt too. I do like the white icing recipe used from the Classics Edmonds book too. You could taste the egg in this version, but as I looked up the online recipe of this, I see they have now included 1 egg instead of 2, so it may not be so with the online version. This online recipe also uses caster sugar which is not in the Classics version and also a half teaspoon of salt. CLICK HERE FOR EDMONDS CHELSEA BUN RECIPE CLICK HERE FOR WHITE ICING RECIPE EDMONDS CHELSEA BUN RECIPE 2 I like fruit in baking, but my family are not overly keen, so I did this version with no fruit. It uses a glaze, but I had an idea to make these smaller, glaze them and then do a dipping icing which I think is nicer than just the glaze.
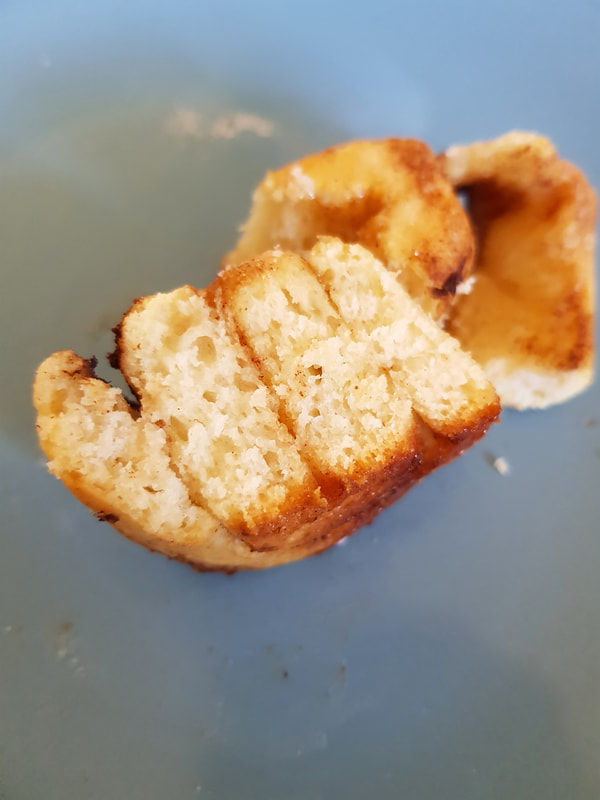
This version is much lighter. We liked this version better.
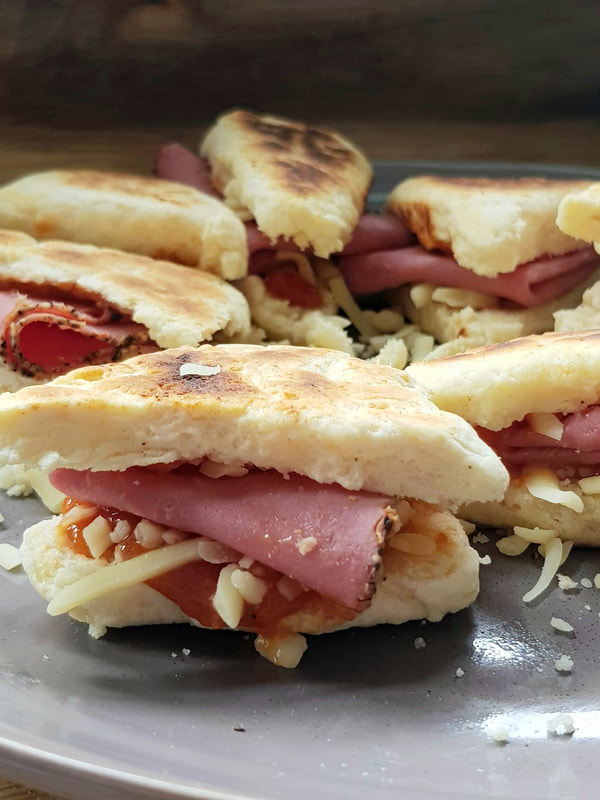
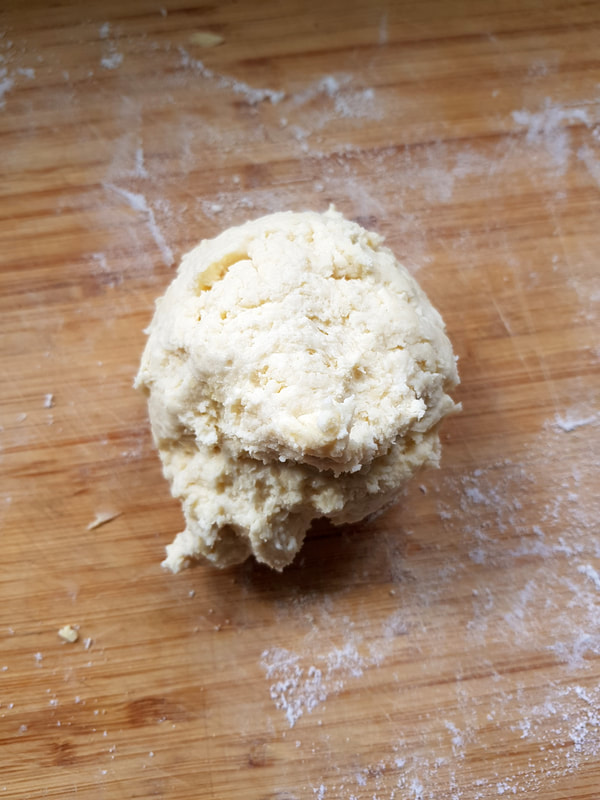
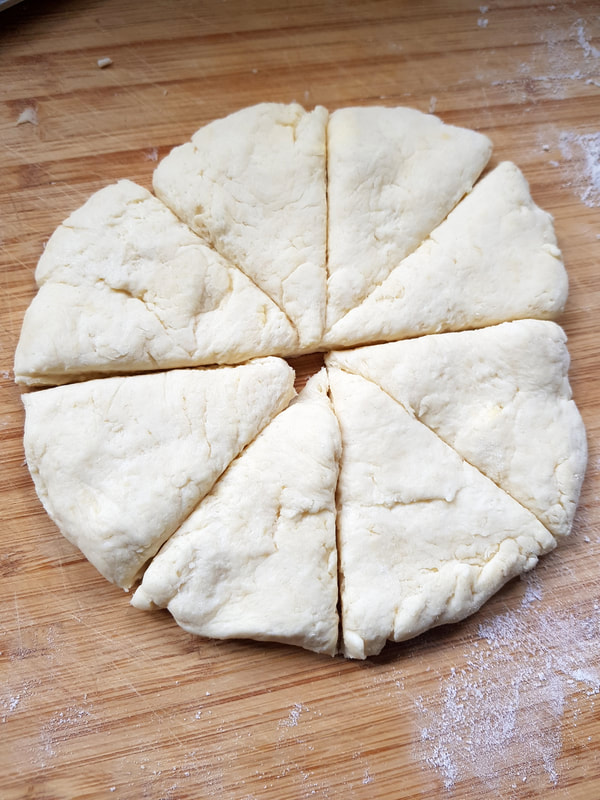
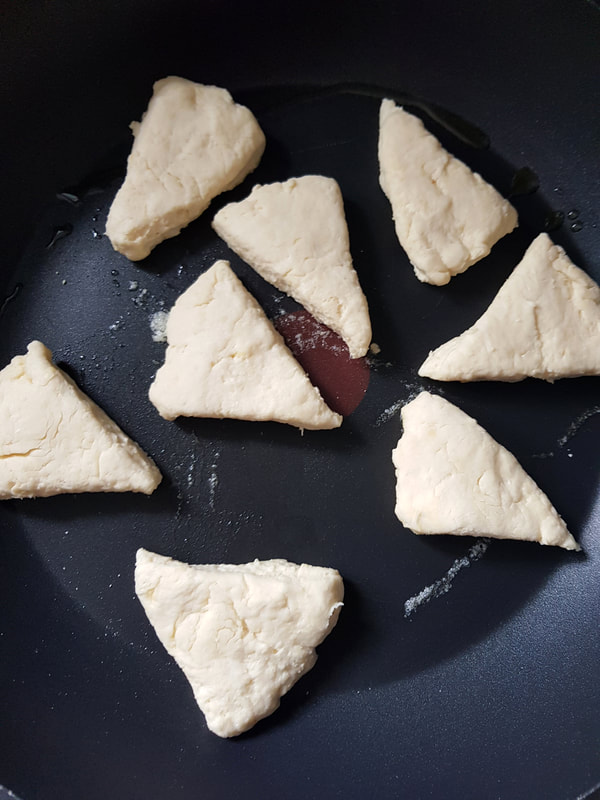
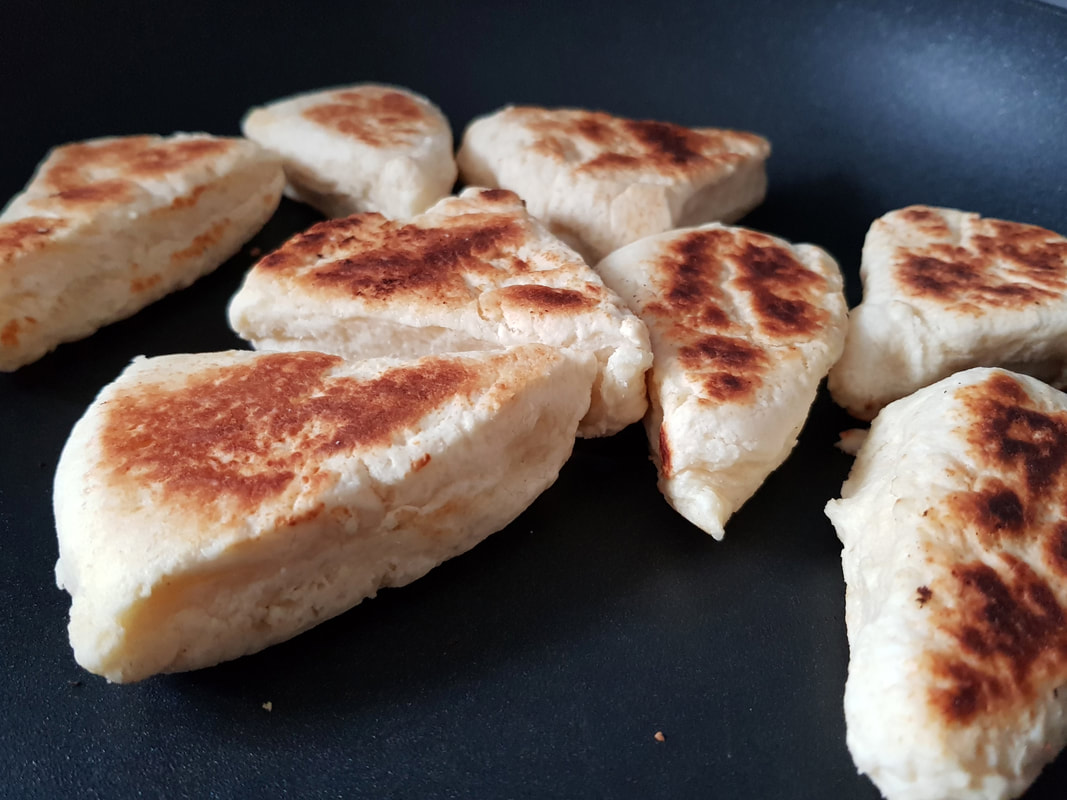
CLICK HERE FOR THIS ONLINE RECIPE FINAL THOUGHTS These chelsea bun recipes were fine, but I like make Chelsea buns a lot, and we all thought my original recipe is better. If you would like to check that out click here: BETTER CHELSEA BUNS The next recipe in the Edmonds Classics Cookbook is Girdle Scones. I had to look up what a greased girdle was. It is a flat iron pan, so I just used my non stick frying pan. My other 2008 edition of the Edmonds Cookery Book, also has a Girdle scone recipe, but uses 2 teaspoons of baking powder instead on 1 teaspoon that is mentioned in the Classics recipe. As my other Edmonds book was a newer edition, I thought they may have tweaked the recipe to make it better, so I also did 2 teaspoons of baking powder.
The recipe only uses 1 cup of flour to make 8 girdle scones. This makes them quite small. If you know the cheddar cheese triangle wedges, these are just a bit bigger than those. They are really quick to make and the texture is nice a light and they are quite yummy. I filled ours with pastrami, cheese and tomato relish. I am calling them, 'High Tea Size'.
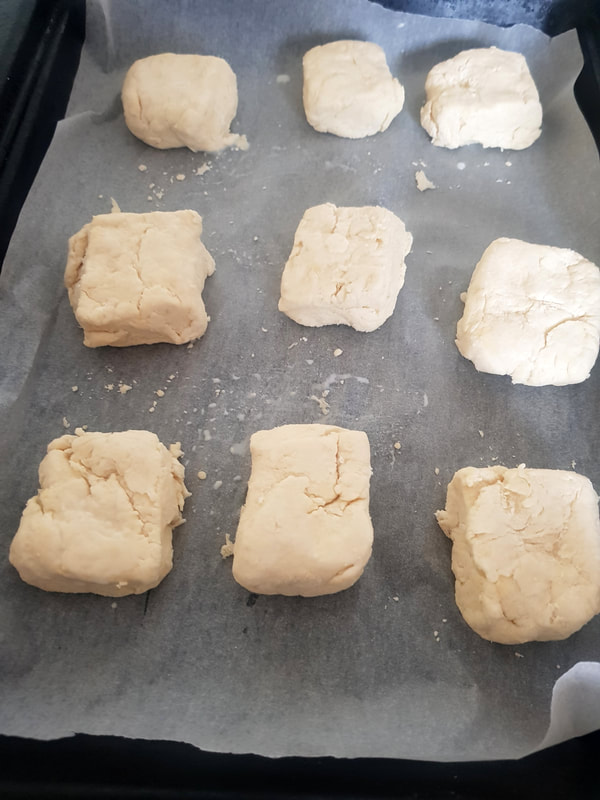
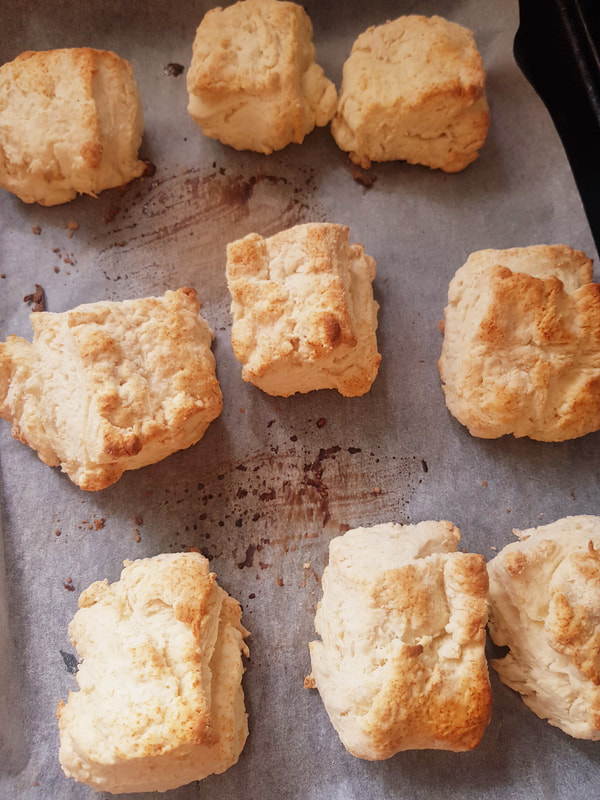
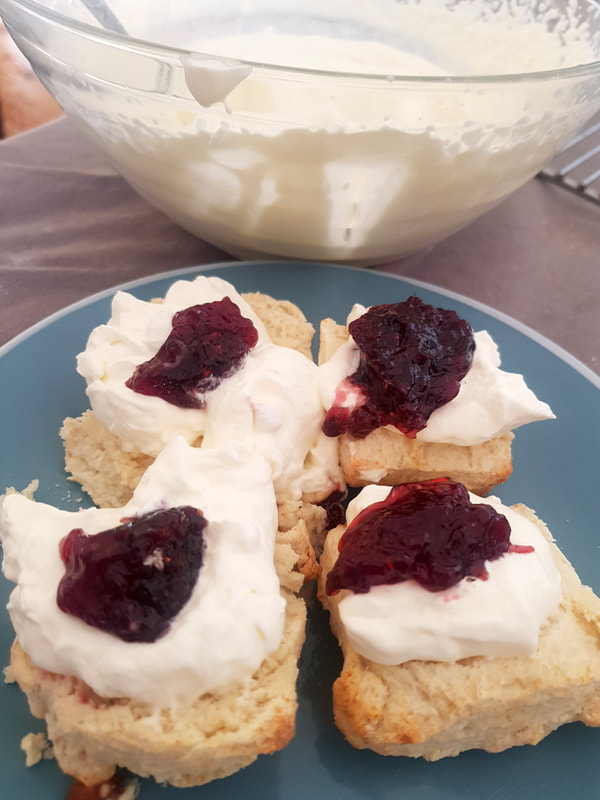
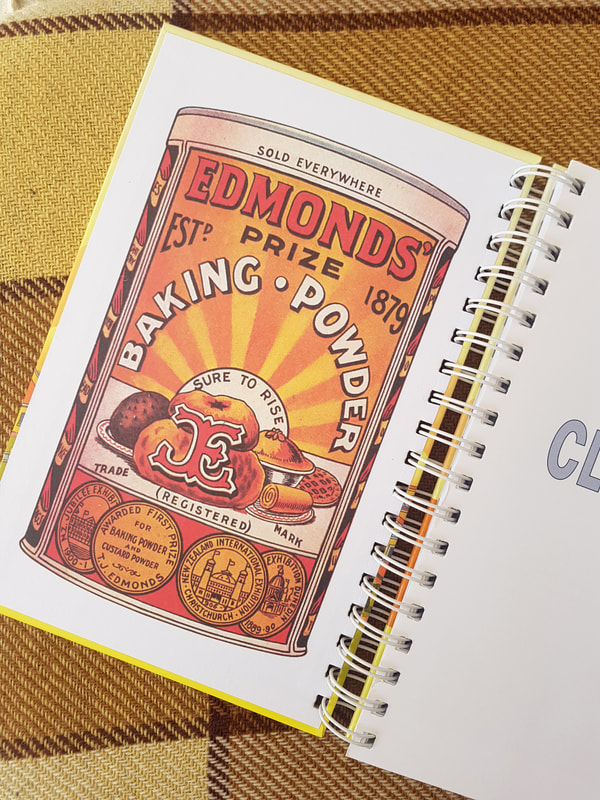
 Baking my way through the Edmonds Classics Cook book filled with New Zealanders favourite Edmonds recipes. (See previous post). First section is SCONES, GEMS & PIKELETS The first recipe is SCONES. Makes 9. It has a badge saying an 'Edmonds Top 20'. There are 6 little stories of New Zealanders and their Scone recipe memories. Lots of childhood memories and Dads baking, associated with this one. I was a bit worried at first with the 6 teaspoons of baking powder ratio with 3 Cups of flour. I thought I would taste the baking powder. But all was well. I have been told not to mix a scone dough to much, so I tried my best. Mine were a just a little on the crumbly side. I might try a tad more moist dough next time. We had them for Sunday brekkie with jam and cream. Leftovers for lunch with cheese and pickle. There is something quite comforting about scones. Yum!
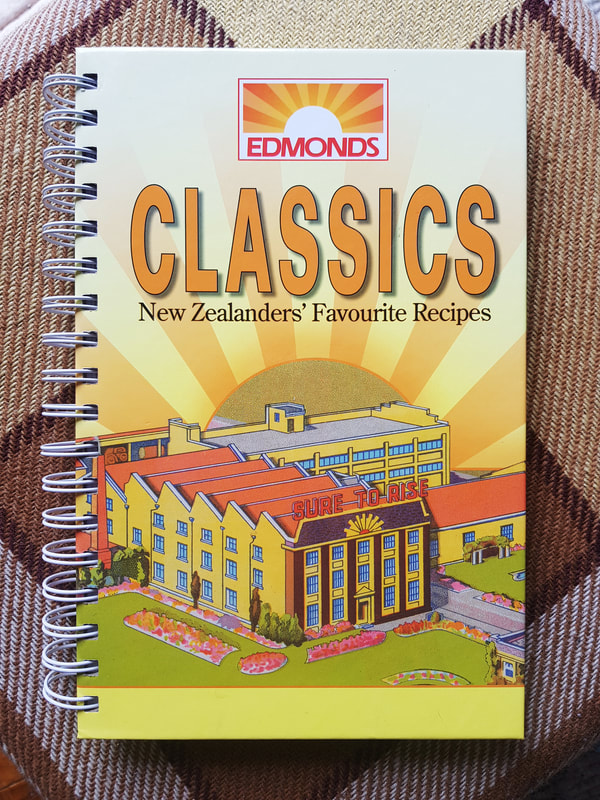
 Brekkie I own 2 Edmonds Cookery Books. One my husband bought for me has piqued my interest because of the vintage illustrations throughout, but also because of the older recipes inside.
The first edition of the Edmonds cookery book was printed in 1908. To see the different editions over the years see this link: EDMONDS COOKBOOKS OVER THE YEARS
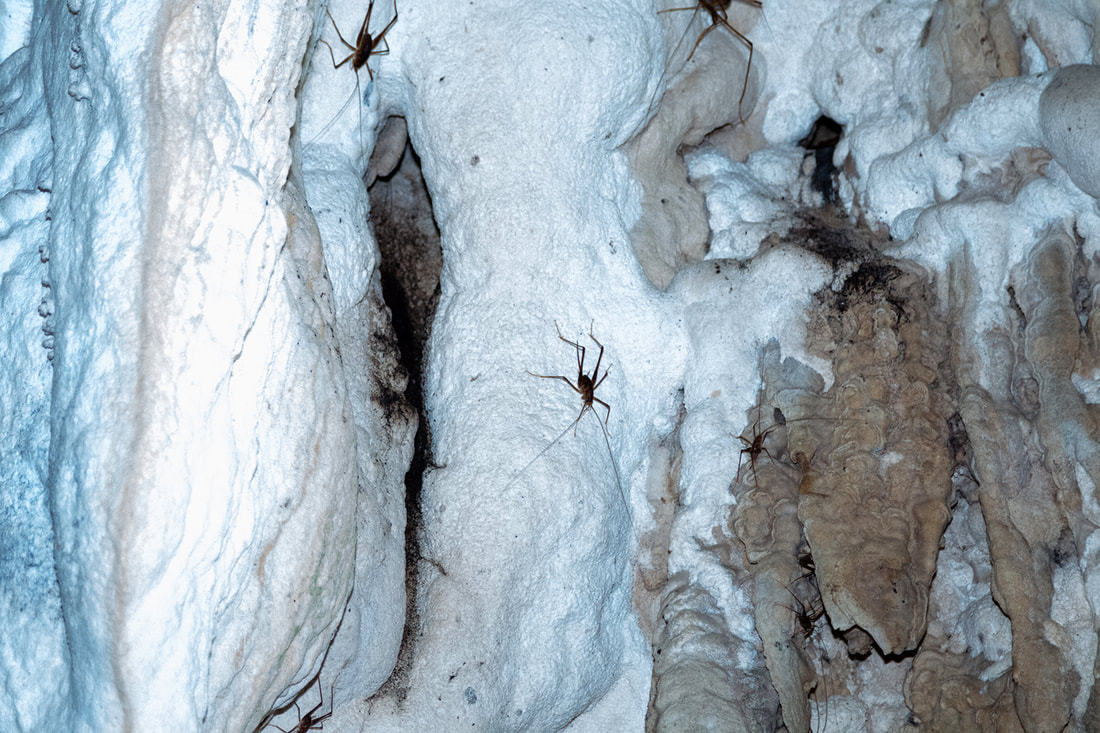
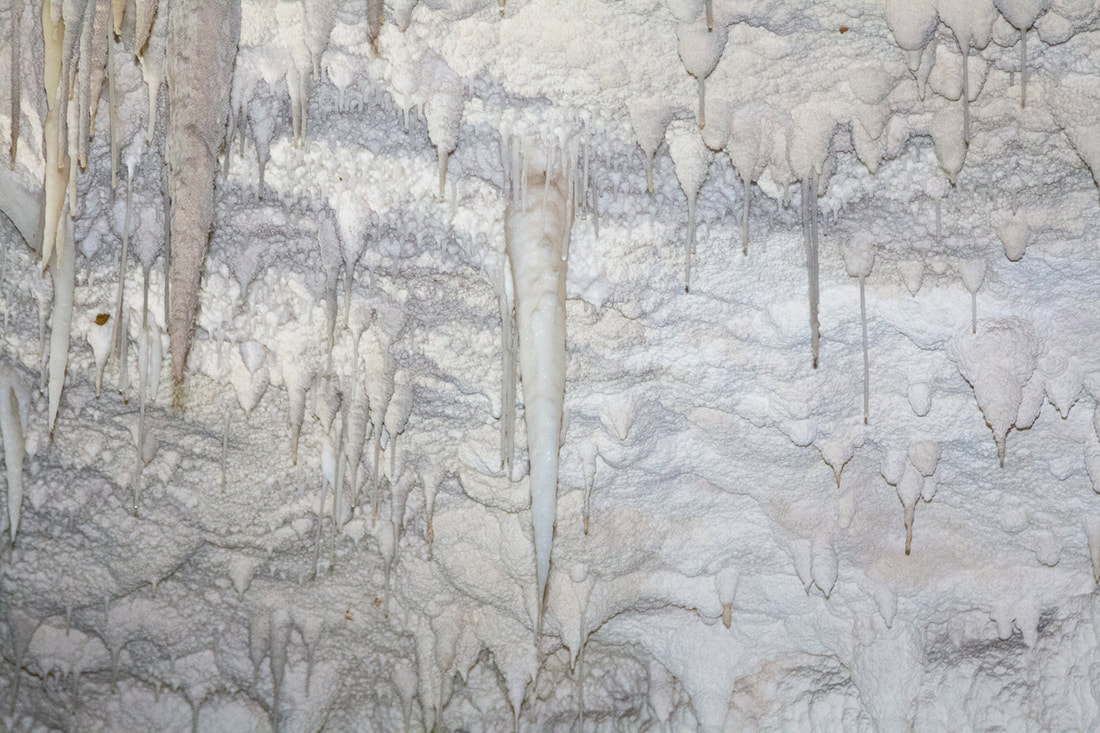
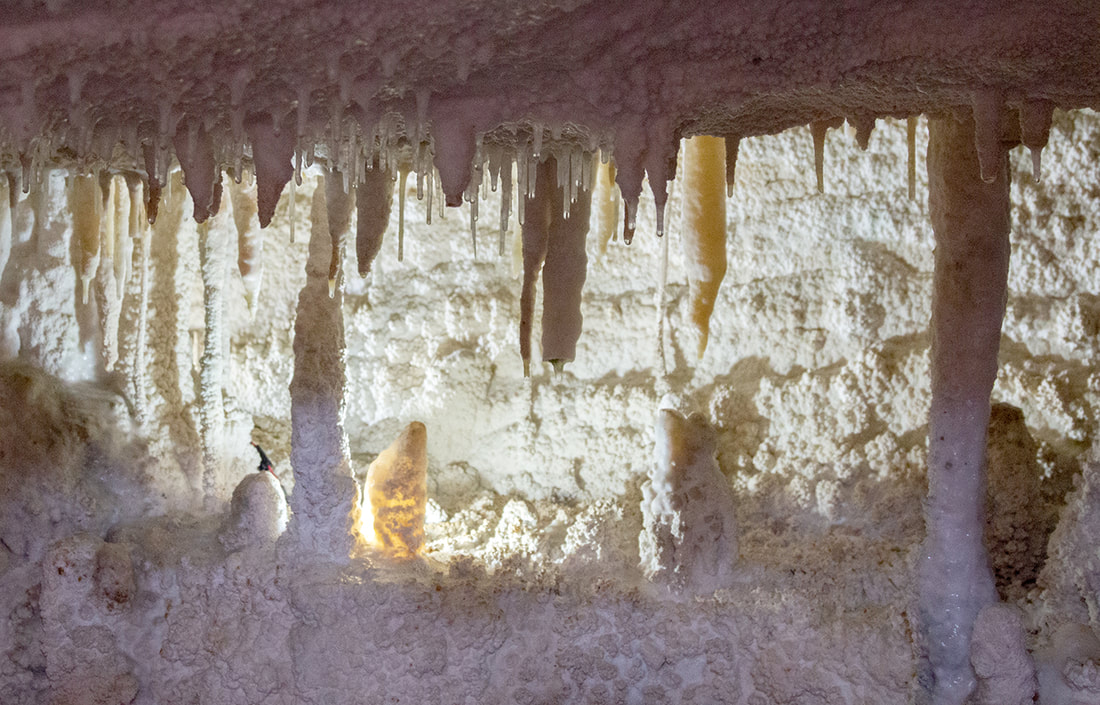
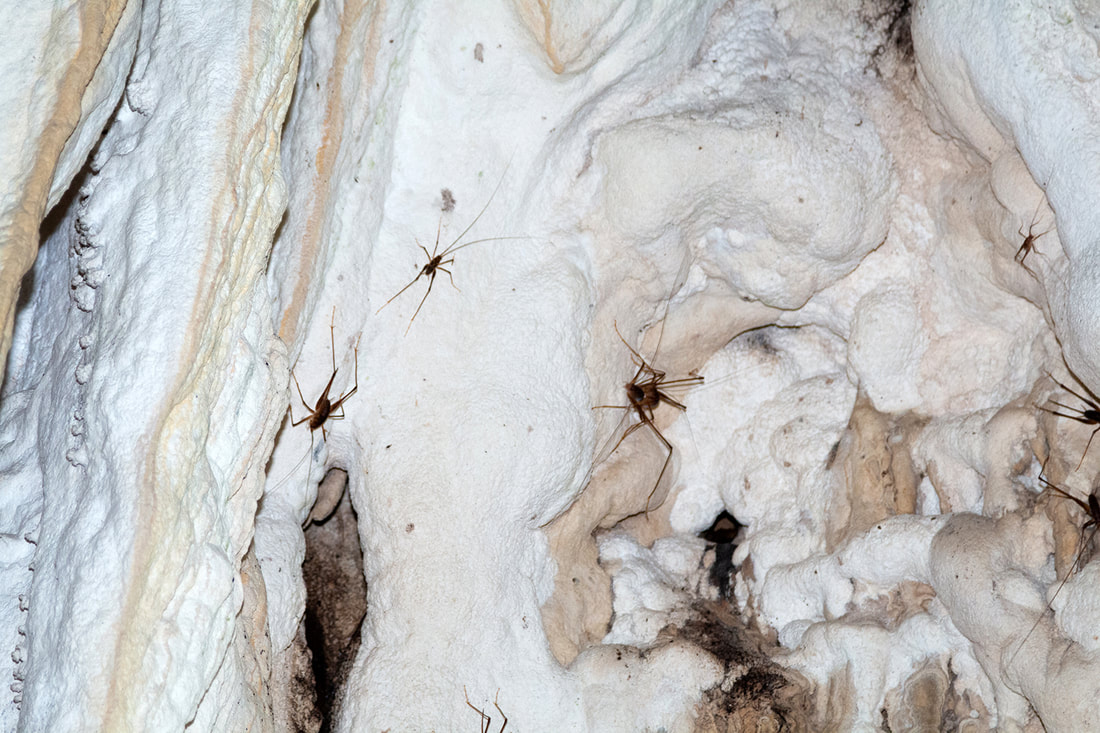
I own the 100 year old edition printed in 2008, but the one I am particularly interested in the Classics version, my husband bought me. In January 2005, Edmonds asked New Zealanders for their favourite Edmonds recipes. They had a strong response with favourite Edmonds recipes alongside memories associated with them. They made up this 'Classics' book, which includes a return of some old favourites. I was enjoying having flick through and reading the memories people had in this edition, and I thought I want to try to try them all and make my own notes on them right into this book. So here is the start of my baking my way through the Edmonds Classics cookbook. You will be able to search for each post under the blog catergory: 'Baking through Edmonds Cook Book'. The first section is SCONES, GEMS & PIKELETS I have had to find out what a greased girdle is and what gem irons are. I have bid on a gem iron on trade me, (already lost one auction, so I'm on my second attempt). I'm just going to use a frying pan for my greased girdle I think. First bake is Scones. See next post.  Today we did the twin cave tour at Waitomo Caves. It was absolutely stunning. There was no cameras allowed in the first Waitomo glow worm cave as the glow worms don't like the noises and flashes. The glow worms were beautiful, and the boat ride under them quite surreal. We next did the Aranui cave. It was full of stalagmites and stalactites. According to our tour guides today, they grow at a rate of only 1cm per 200 years. The Aranui cave was first discovered while pig hunting. The two tours were wonderful and the caves were amazing. Here are some photos of the Aranui cave at Waitomo Caves, New Zealand.
This was definitely a showcase for something that takes Time and is Beautiful
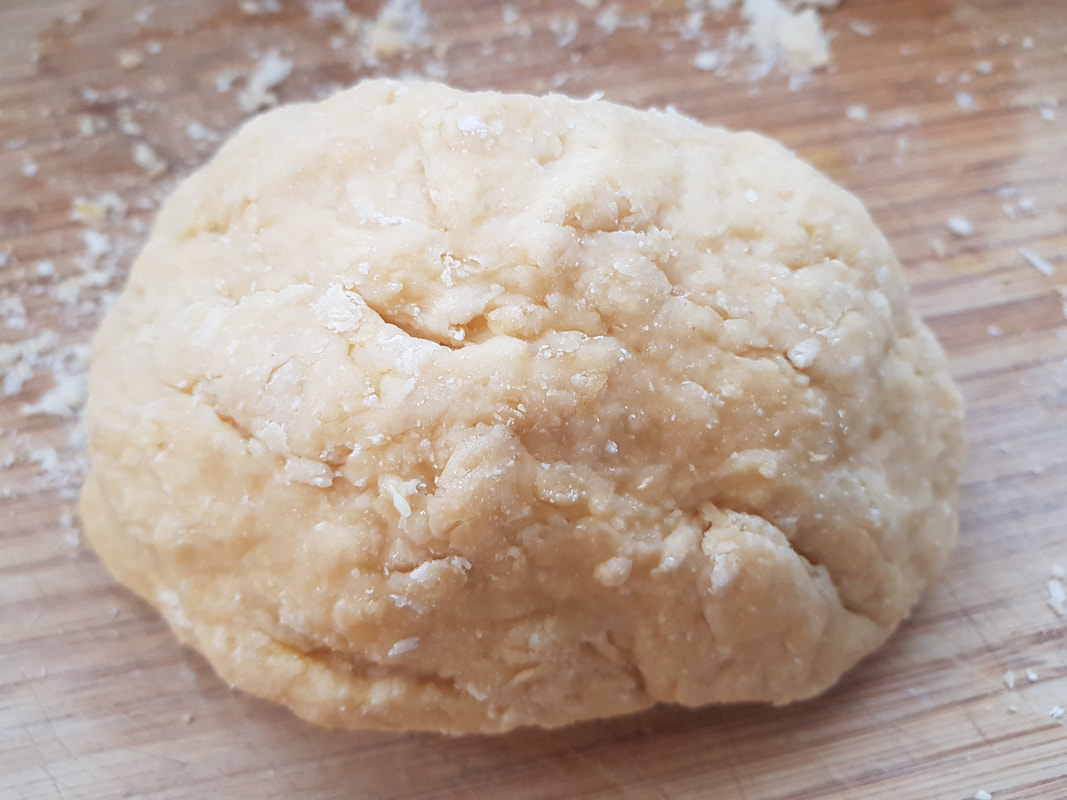
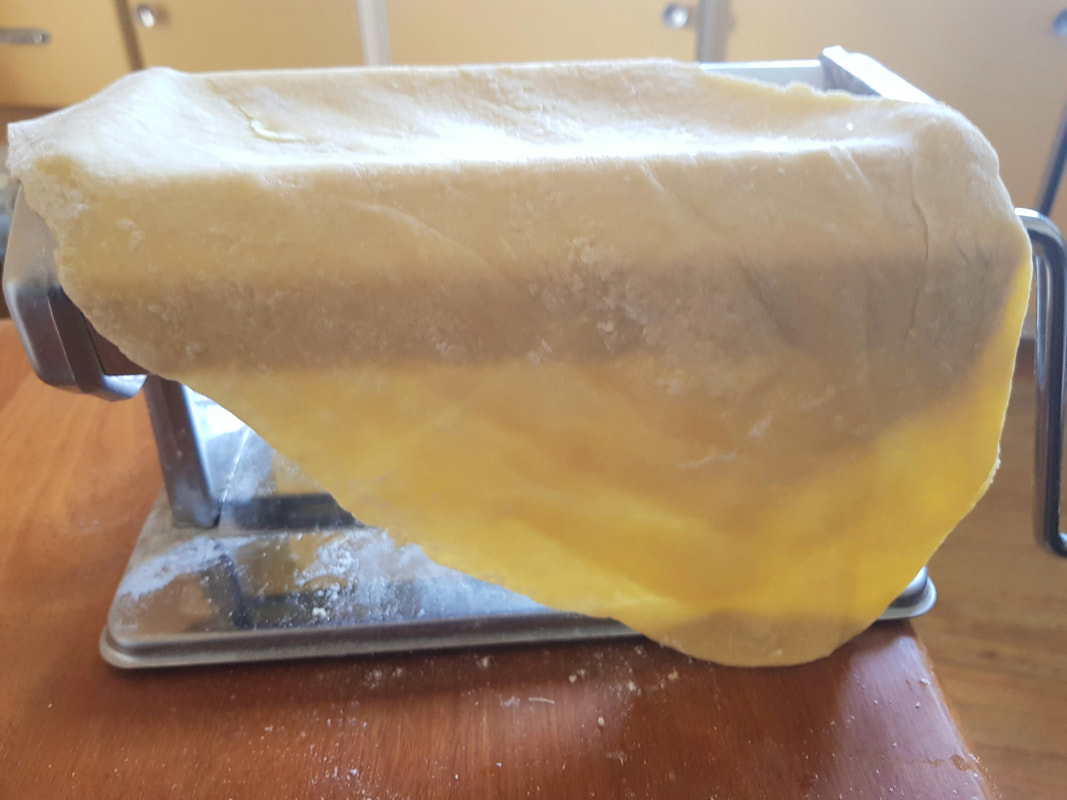
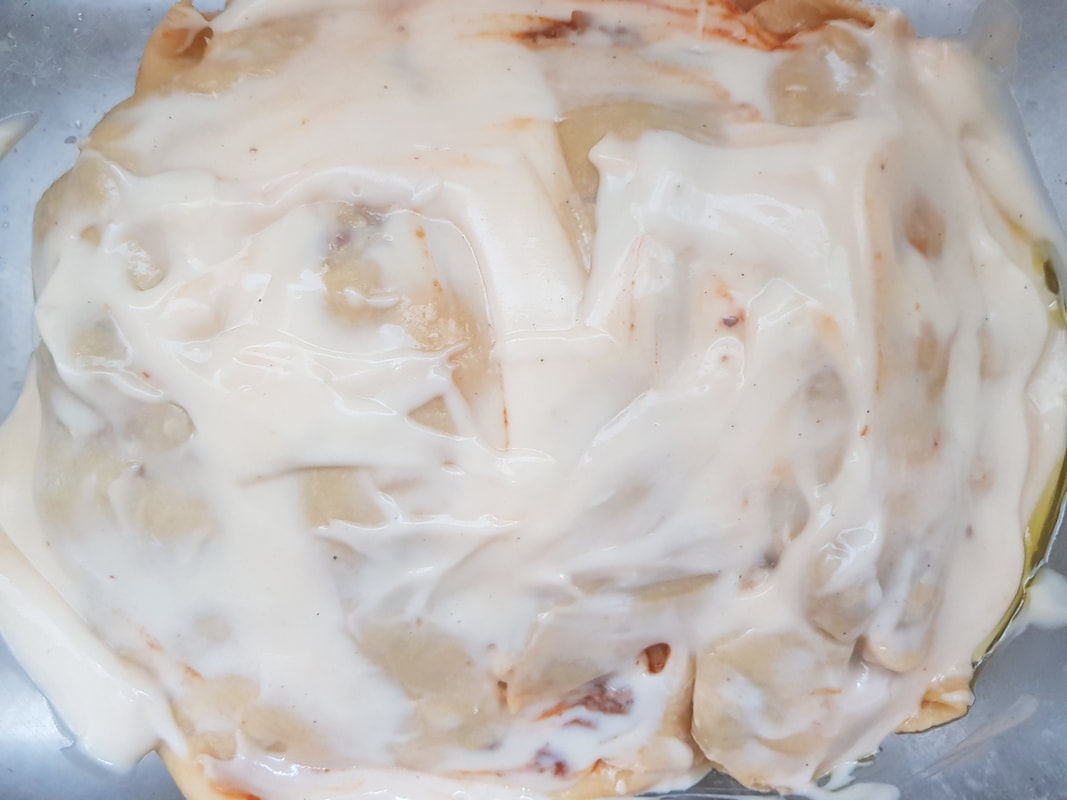
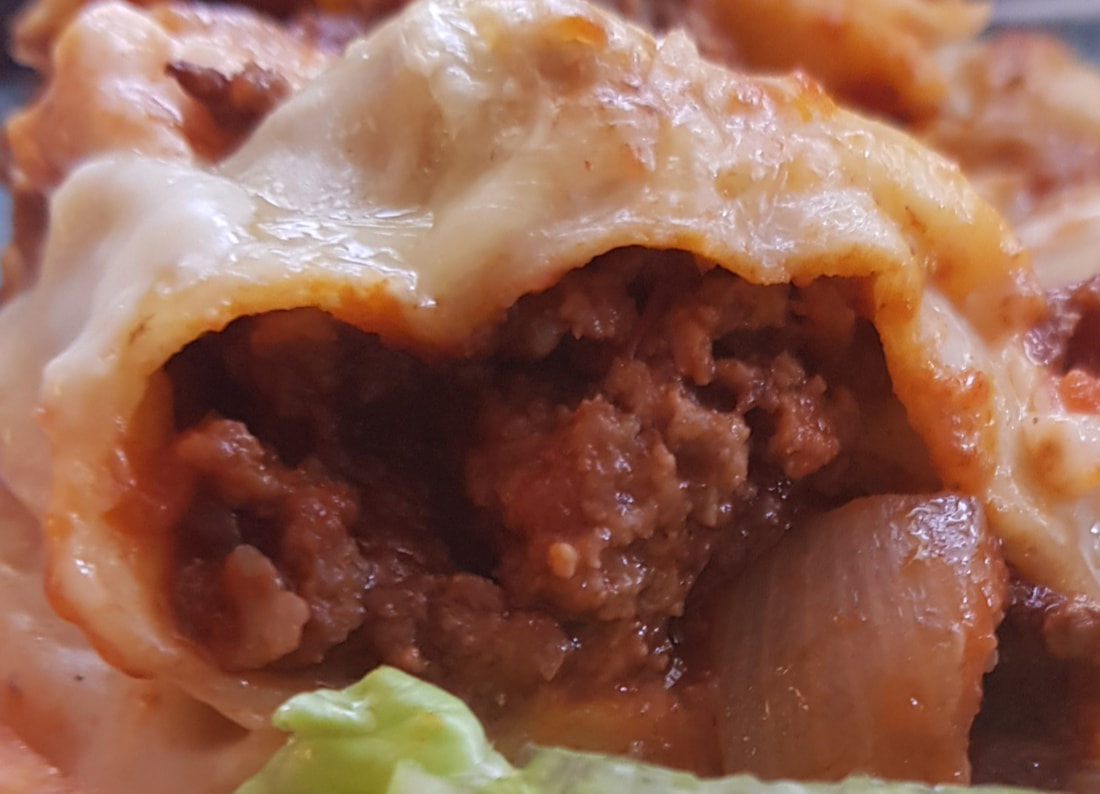 Home made pasta is soooo goood. It turns you into a pasta snob, shaking your head and pffting as you walk past the dried pasta section in the grocery shop. It is not hard to make and doesn't take that long. Here is my easy egg dough recipe and a quick dinner you can make with it. Egg Pasta Recipe3/4 Cup of white flour and 1 medium egg per person you are cooking for. Put it all in a bowl. Then I give a swirl of olive oil into the mix. 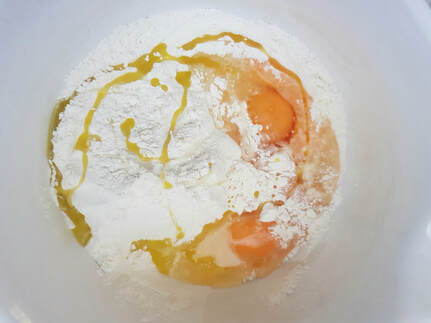 I am making pasta for 4 people. So I have used 4 eggs and 4x 3/4 cup of flour. You can use a mixer if you want, but I just use my hands and mix it till it forms a firm dough. I knead it enough that it all holds together. Then wrap it while you make you other things for your dinner. In my case I am making pasta rolls or cannelloni type dish. So while my pasta is resting I'm cooking up mince with a pasta tomato sauce.
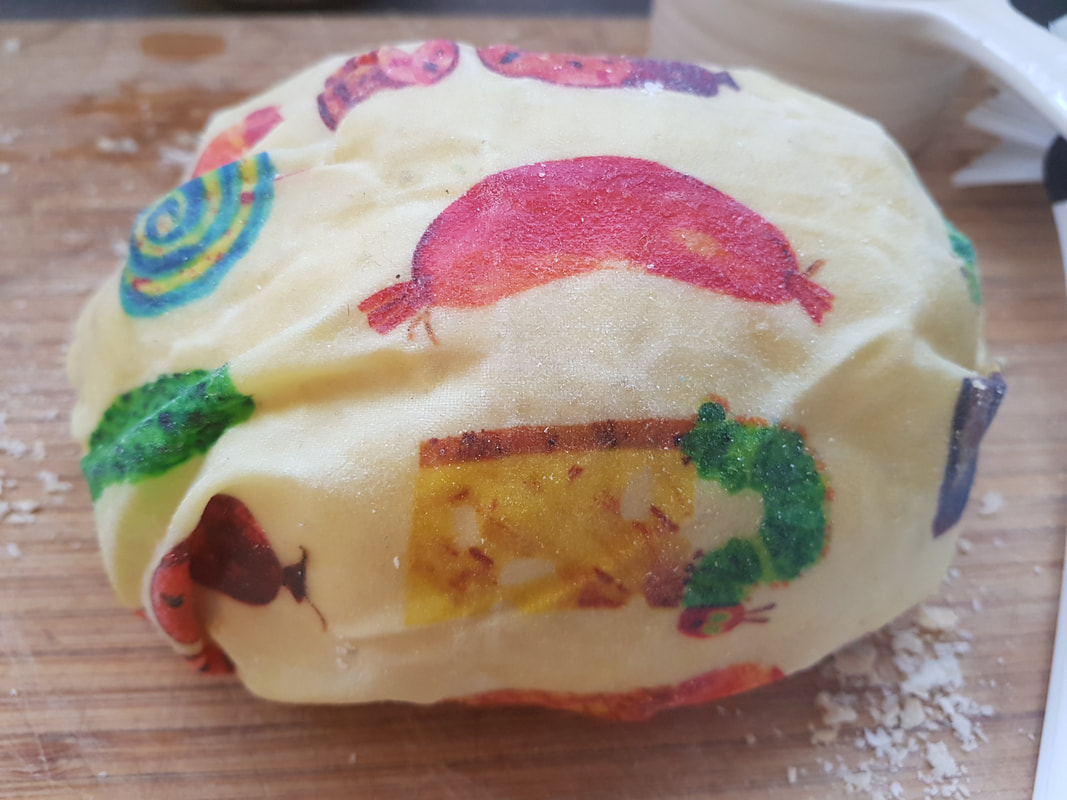
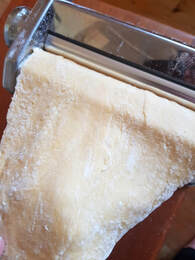
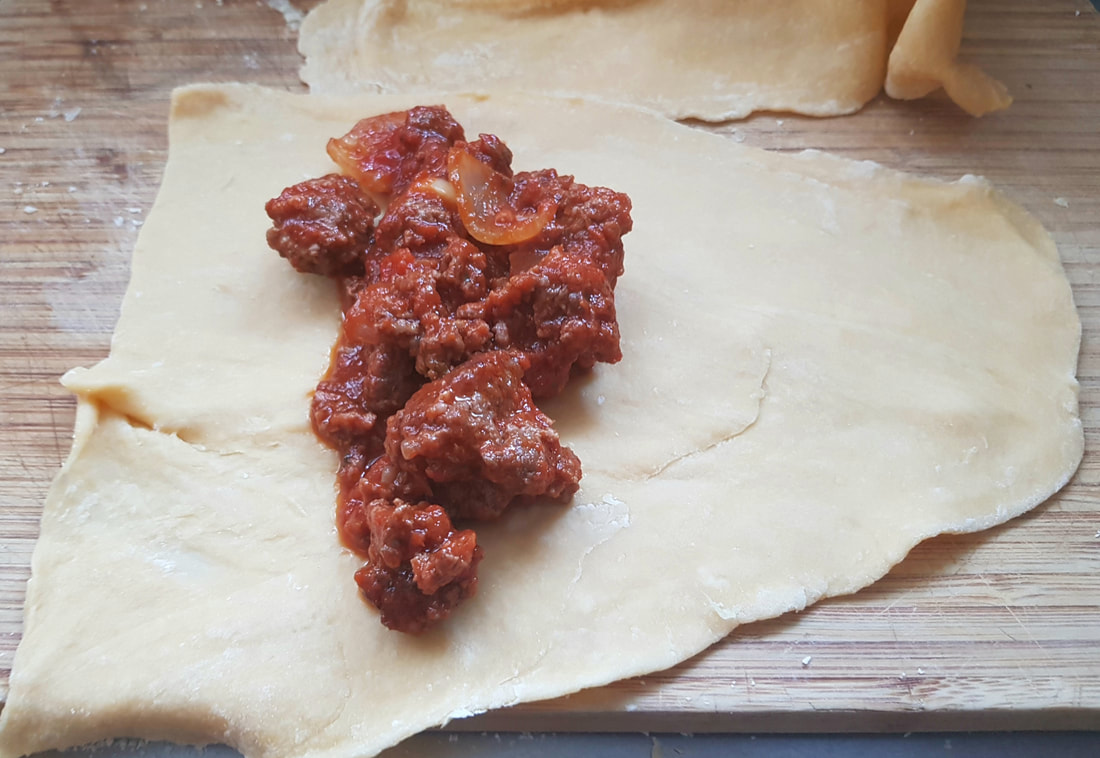
Because it doesn't take long to cook mince, I just leave the dough out in the kitchen with me. But if it is a hot kitchen and you are going to be awhile, I would put it in the fridge and bring it out just before you need it. While it have been resting at room temperature, the dough will be getting softer. I am wanting pasta sheets today, so I divide the dough into 4 pieces to roll separately. Just before I roll each piece, I flatten it slightly and dust with flour. 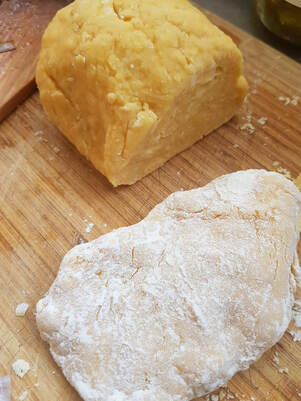 I use a pasta machine for making my pasta sheets, but if your good with a rolling pin, you could use that too. I roll the pasta to a thickness that I know will hold mince without breaking, but still has a slight opaqueness to it. That is the pasta dough recipe, but you can make spaghetti, ribbons or whatever you like with it. If you are cooking it in boiling water, it does not take as long to cook as dried pasta, and remember even when you take it off the heat, it is still cooking. I only boil it for a couple of minutes. Read on to see how I used the pasta dough for my pasta rolls.
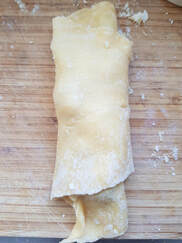
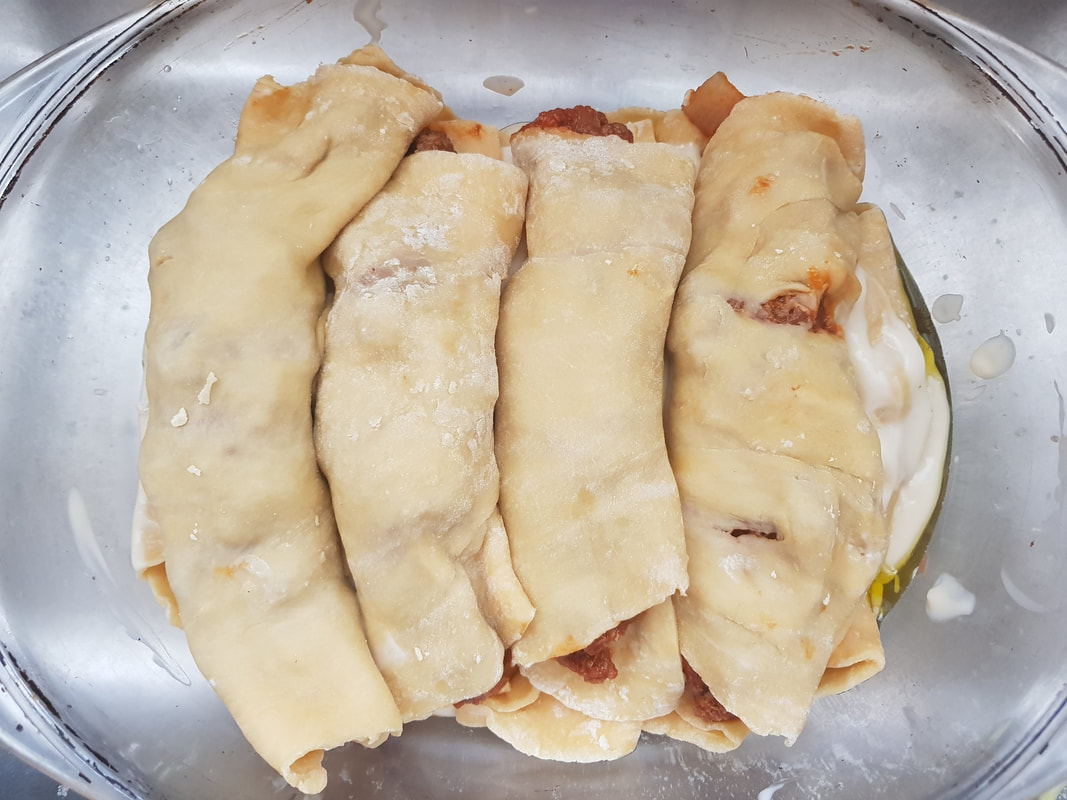
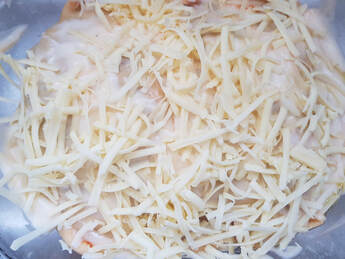
I cut each of the 4 sheets in half, to make 8 rolls. Put mince by the wider edge and roll up. Put in a baking dish with cheese or white sauce. Top with cheese and bake at 180 degrees celcius until the cheese is melted how you like it, about 25 minutes for me.
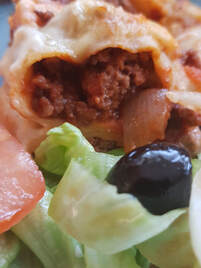
I like this dish with a salad and olives, my sons eat it with gherkins...because he says it tastes like a Big Mac... go figure...
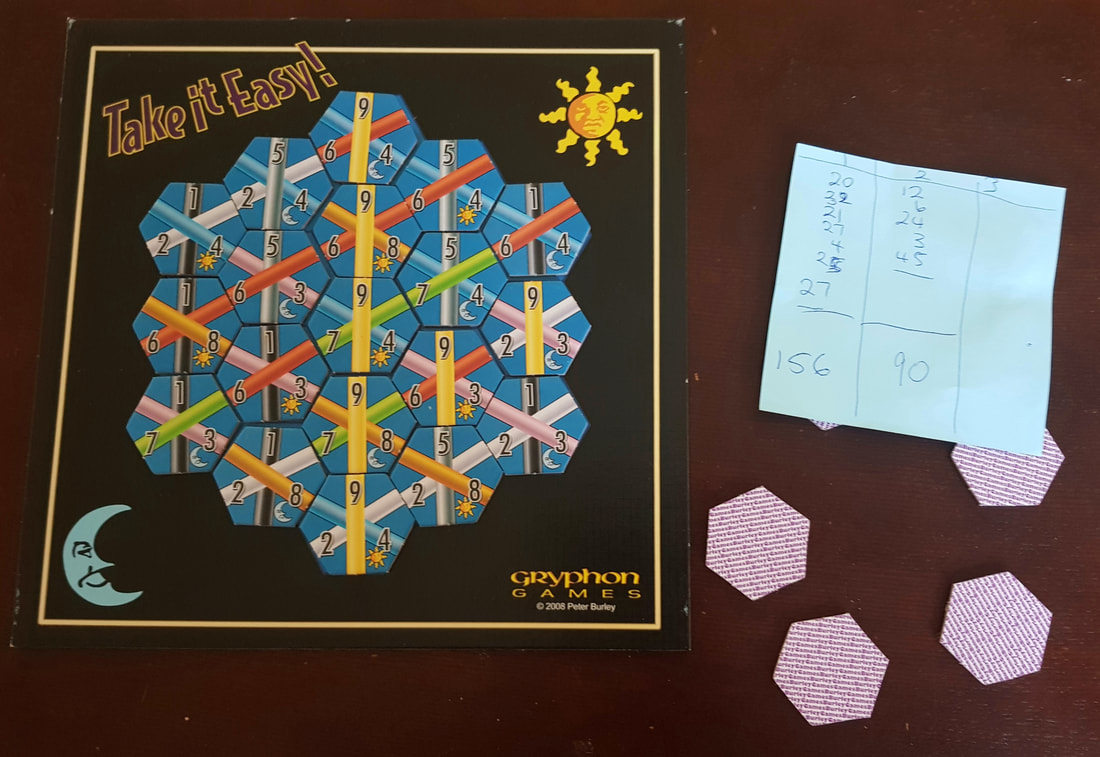
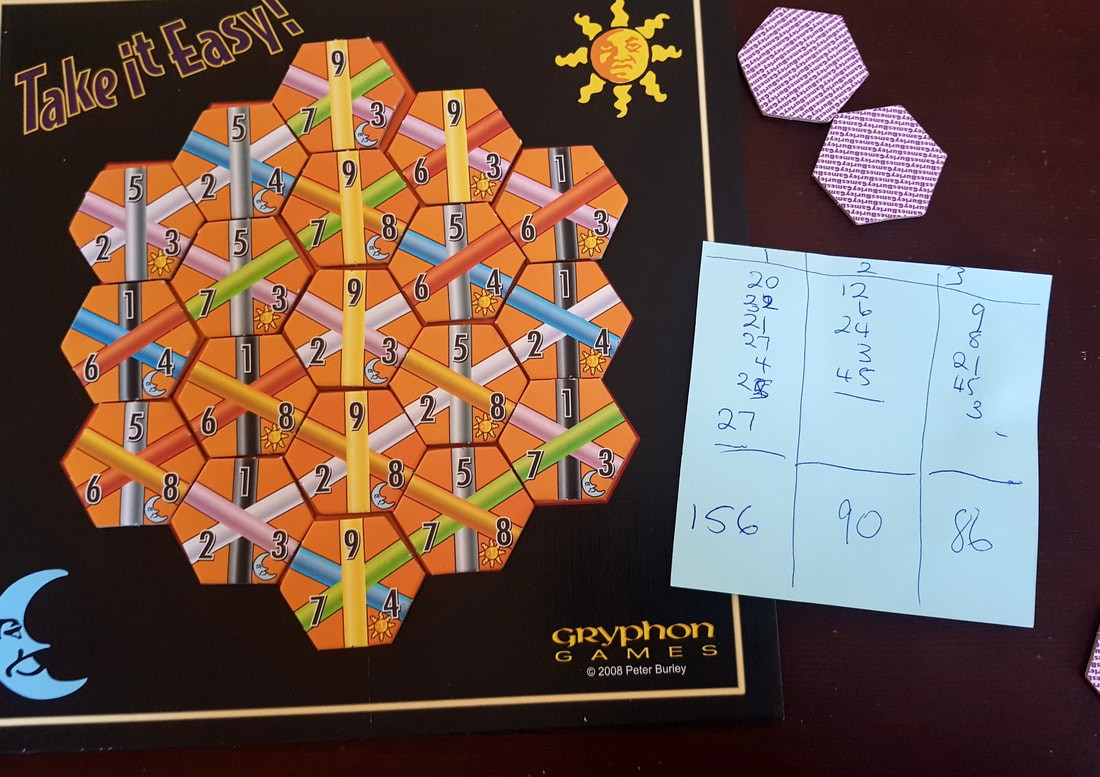
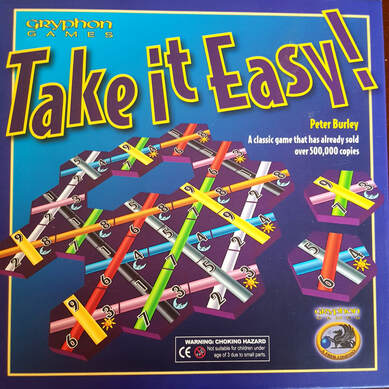 Take it Easy is a game I bring to dinner parties or a group of friends who don't usually play board games. It plays a bit like a puzzley Bingo. It can play from 1-6 players. Each player has a coloured board and matching coloured tiles. Each player places the tiles face up in front of them, (every player has the same tiles on in their colour). One player is the caller and they have their tiles face down. The caller will then pick up on randomly, call it out and everyone has to place that tile of their board. There are more tiles than what fits on the board, so every game is different. The aim of the game is to get as many same coloured pipes connecting from one side of your player board to the other. At the end of the game you score the total amount of those completed pipes. For example on the cover pic, there is a completed line of orange 8 pipes. This line would score 8 x 5 pipes = 40 points. There is also a completed line of white 2 pipes. This would score 3 x 2 = 6 points. There is a bit of skill involved in knowing where to put good scoring tiles, but on the whole it is how well you've place randomly picked tiles and one game you can score great, and in another game completely bomb. It is fun to play with new players. I love hearing the groans and blaming the caller when the wrong tile is called, or the squeals of delight when something fits just right, and both happen to you in a game. The game does not take long either, so they are usually keen for a more plays. There is no difference when playing solo except you are drawing from your face down tiles and trying to better your score each time. There is also quite a few variants to try in the rule book. They make the game more challenging, and I find it challenging enough, so I haven't tried them yet. Here are photos of the last 3 games I played solo.... I just got worse! hahaha 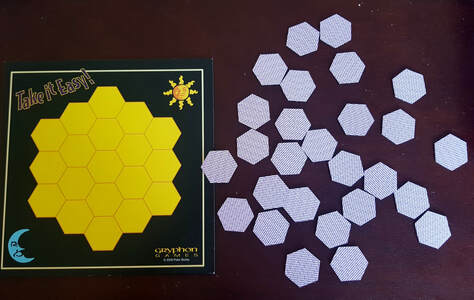 The solo mode set up
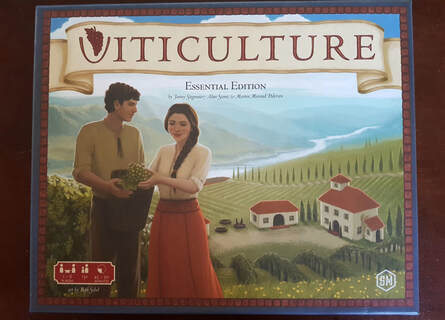 Viticulture is a Stonemaier game that uses the Automa system for solo game play. It is very clever. It is a deck of cards where the top card is turned over for each automa turn, and there is usually some marker of what action to take for that turn. In Viticulture it is colour coded for the 4 seasons, so depending on what season you are in, is what the Automa actions will be. 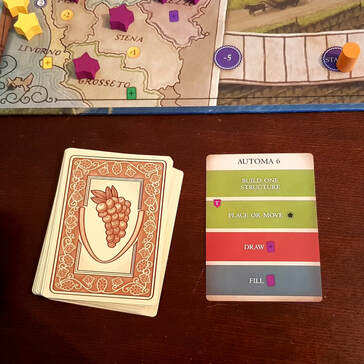 I like Stonemaier games, they are beautiful and they are fun. I like the Automa system too, but I do find them really challenging, especially in Viticulture. In Wingspan, the other Stonemaier game I own with Automa, you seem to accomplish more. In Viticulture you have 7 years or rounds to try and beat the Automa score, but I find it is only the last 2 rounds anything really happens and it is over before I feel like I've really done anything. I don't want it to be easy. It is good that it is a challenge, but I find the solo play in Viticulture more frustrating than fun. Maybe I just haven't got a good strategy with this one yet. The last solo game I played, when I took these photos, I only got one wine order completed. I could have got more, but the Automa blocked me the last few rounds. So my verdict on this one is that I really prefer the multi player over the solo game. 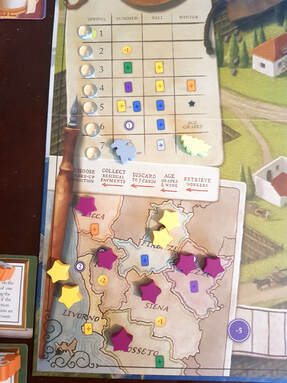 In solo play you play each of the different starting points once, in any order. You take the glass token and this can be spent to do a bonus action on the action area where your worker is.  SOLO BOARD GAME RANKING - with the board games I own
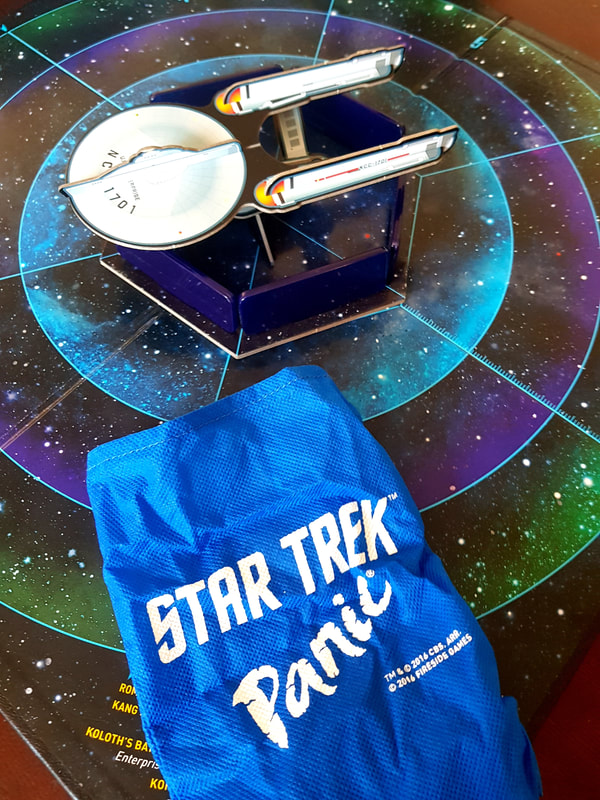
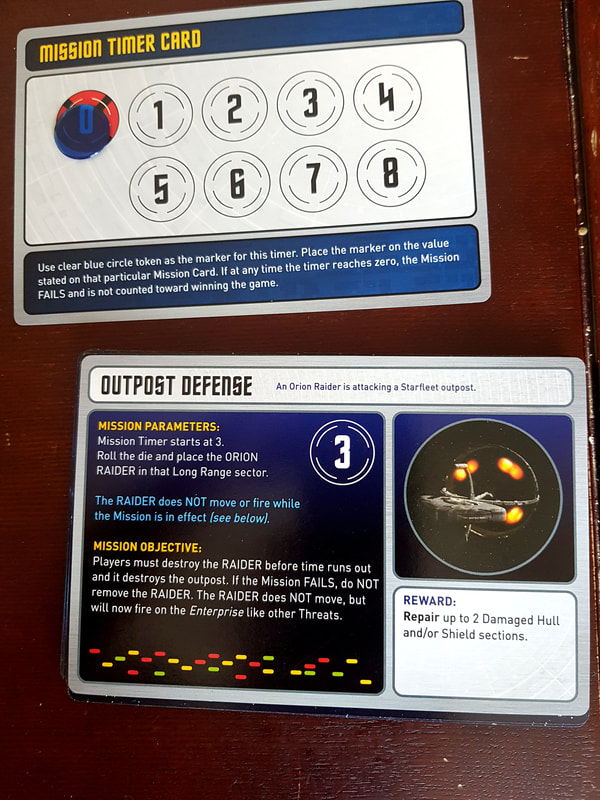
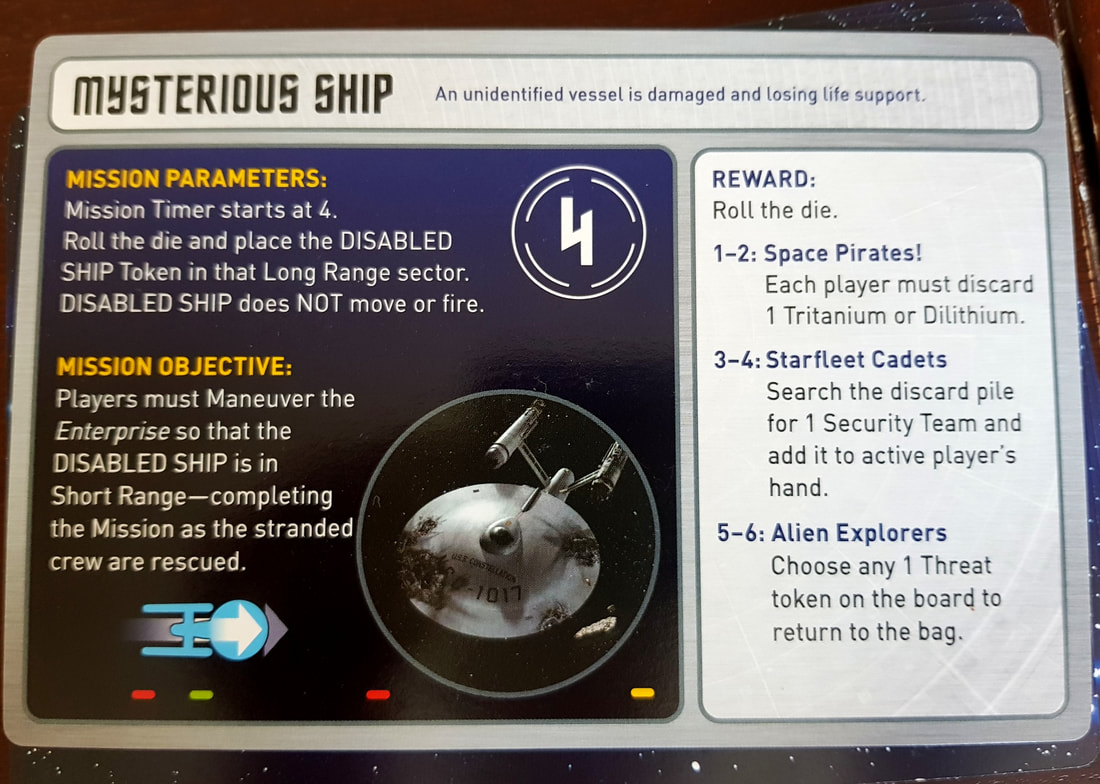
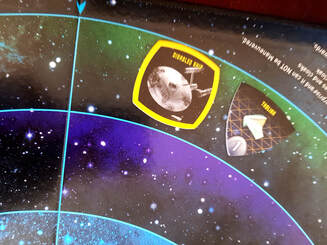
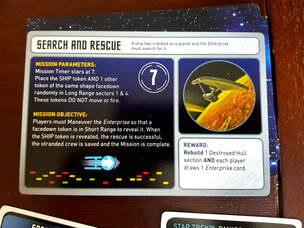
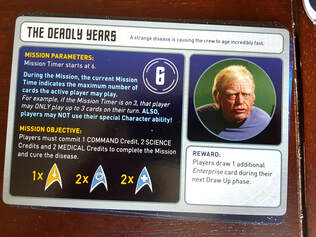
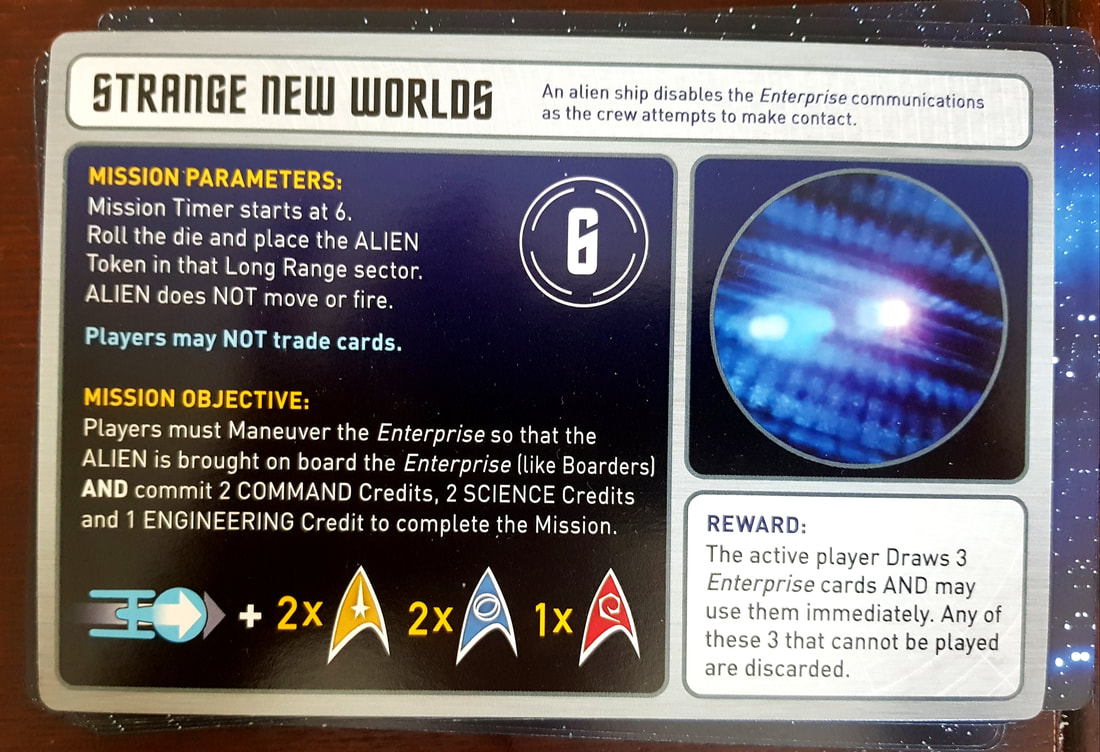
1st Terraforming Mars 2nd Bandido 3rd Clans of Calendonia 4th Star Trek Panic 5th Ganz Schon Clever 6th Castles of Mad King Ludwig 7th Parks 8th Wingspan 9th Sagrada 10th Viticulture 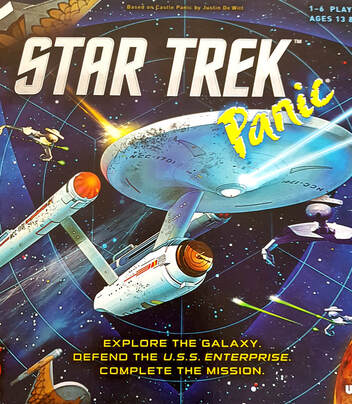 Star Trek Panic is a cooperative game where players act as members of the Star Trek crew to try complete 5 missions before the Enterprise gets destroyed. If you are on a roll, you can complete up to 10 missions, to see how you can get. There is no difference in the solo play, except you cannot obviously trade a card with another player..... its you against the galaxy... all by yourself.... This game is super fun especially if you are a Star Trek fan. I love the Enterprise ship that is part of the game and the cool shields and explosions that come with it.
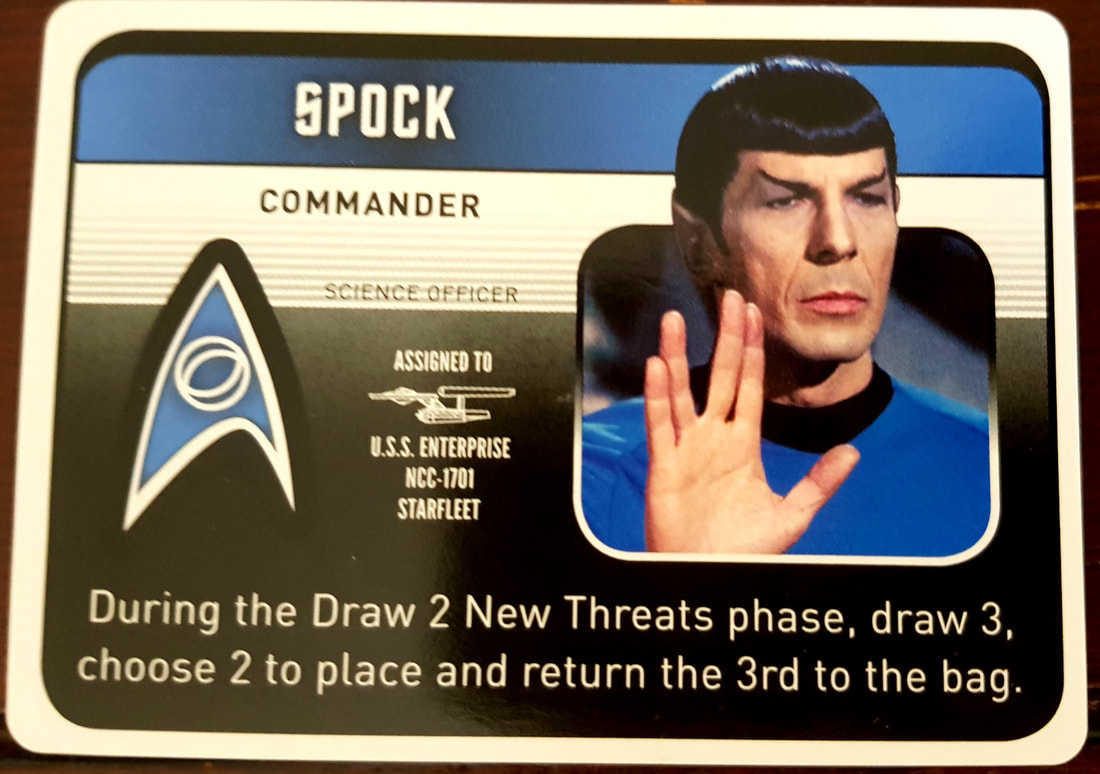
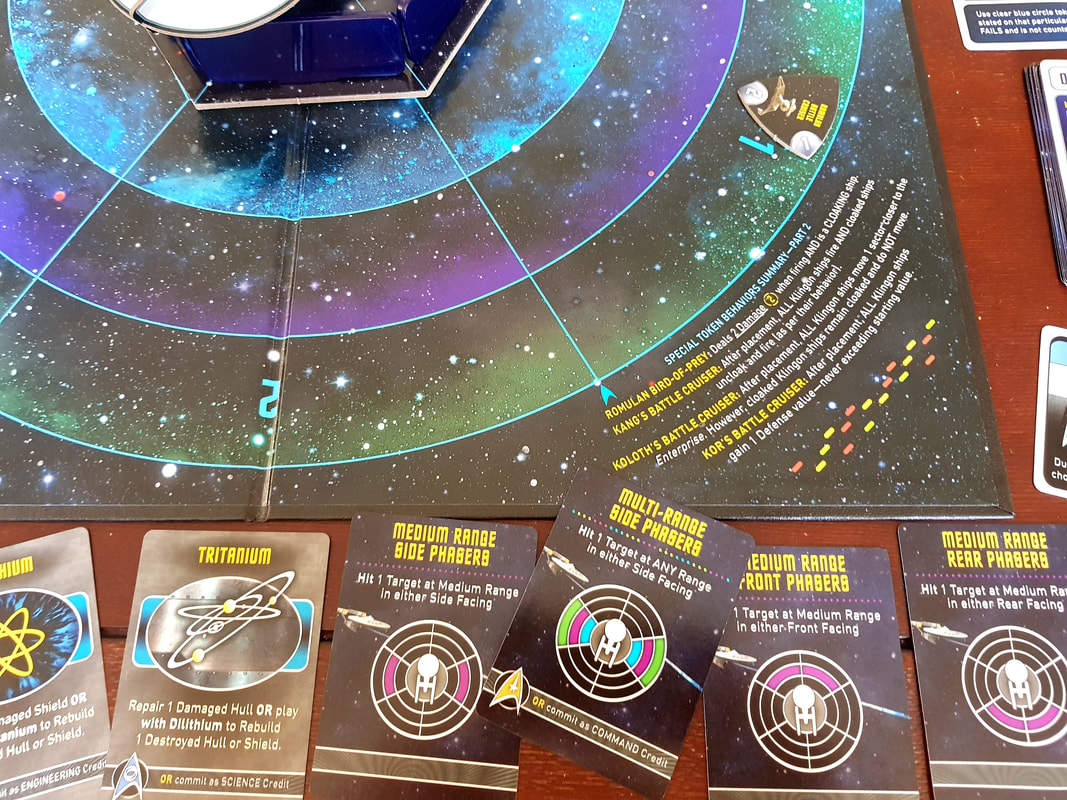
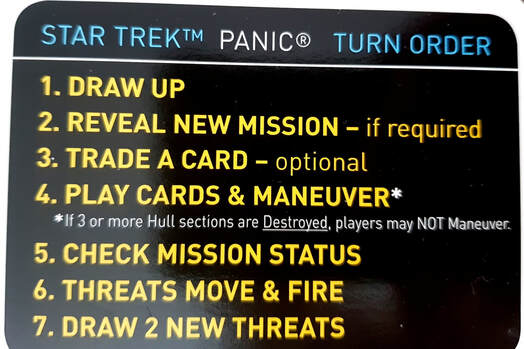 There is a handy turn order card, so you know exactly when to do things. In a solo play, you miss out number 3. 1: After you have picked your character, you start with 6 cards in your hands that do various things. Some cards fire at different distances and sectors, some help protect you or help you repair damage. 2: Reveal a mission. Now that I have had the game awhile, I do wish there was a next generation and new missions expansion. We have done the missions included a few times now. There is still a variety in play in the randomness of the drawn threats, the timing of the missions, and what characters you play, but I think there will be a point when we will feel like we've played out this game. Miss out 3 for solo play, but with multiplayers the active player can trade one card with another player. 4: Play the cards and maneuver. You can play as many cards out of your hand as you would like. You can turn the Enterprise one facing in either direction. This helps if you want to put the shielded area in front of enemies or give them the part of the Enterprise that is already destroyed, as they can't destroy it anymore than it is. 5: Check to see if you have completed the mission. If you have you get the reward stated and put a counter on the mission scoring ladder. If not you put the mission timer down one, (missions state how many rounds you have to accomplish it). If time is up, you discard the mission as a fail. Some missions have punishments for failure, but most are put down as a fail and you have to try another mission usually with a fair amount of damage to the Enterprise. 6: Threats move and fire. You will usually have some enemy ships hovering around. In this stage they come in closer and fire one or two shots, even board you, doing some kind of damage to the Enterprise. 7: Then to top it off you have to draw 2 more threats from the bag of evil!! I really do enjoy this game, just as much as a solo as I do multi player. I have mentioned my worries about lack of more missions, but at present I'm still enjoying it. Here is how the last solo play went. I thought I'd won completing the 5 missions, not that the Enterprise would have lasted much longer. But on writing this I realised I'd made some mistakes, so I may not have done it. Here is the rundown with the mistakes I made.
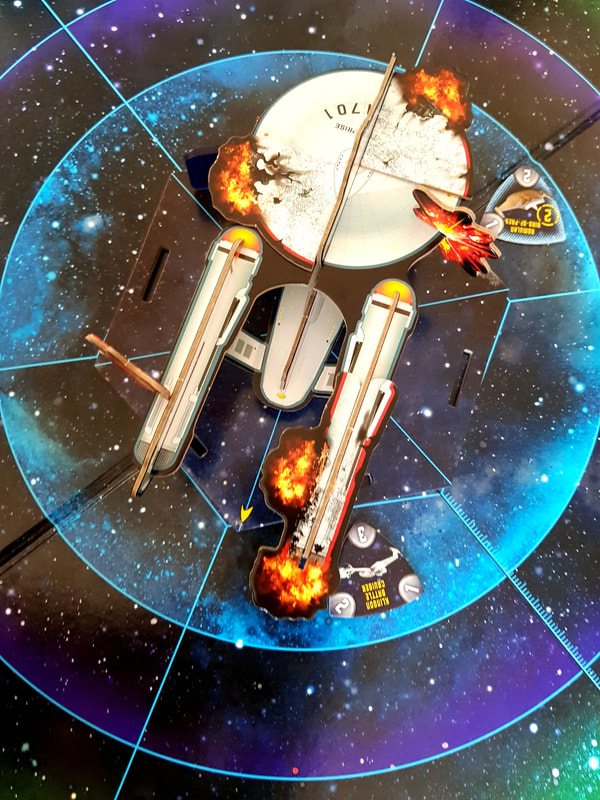 The Enterprise at the end of the game. Because 3 parts of the hull had been destroyed, I couldn't maneuver it any more. It wouldn't have lasted much more. SOLO BOARD GAME RANKING - For the board games I own 1st: Terraforming Mars 2nd: Bandido 3rd: Clans of Calendonia 4th: Star Trek Panic (this would actually be 3rd if it had more missions to add) 5th: Ganz Schon Clever 6th: Castles of Mad King Ludwig 7th: Parks 8th: Wingspan 9th: Sagrada |
AuthorThe Gatherer of Categories
All
|


 RSS Feed